PushMetrics can mirror your report configurations as YAML files in a GitHub repository. Once connected, the Sync to Git action pushes the whole workspace to the repo in a single commit, and Sync from Git pulls the repo back. Per-report Git History lets you preview and revert any past version of a report. This is the recommended way to keep an audit trail of how your reports evolve and to promote changes between environments.
Before you start
You will need:
- A GitHub account with permission to create repositories (a personal account or an organization you belong to).
- The Workspace Admin role in PushMetrics. The Git Integration panel is read-only for non-admin users.
- About 5 minutes.
Create an empty GitHub repository
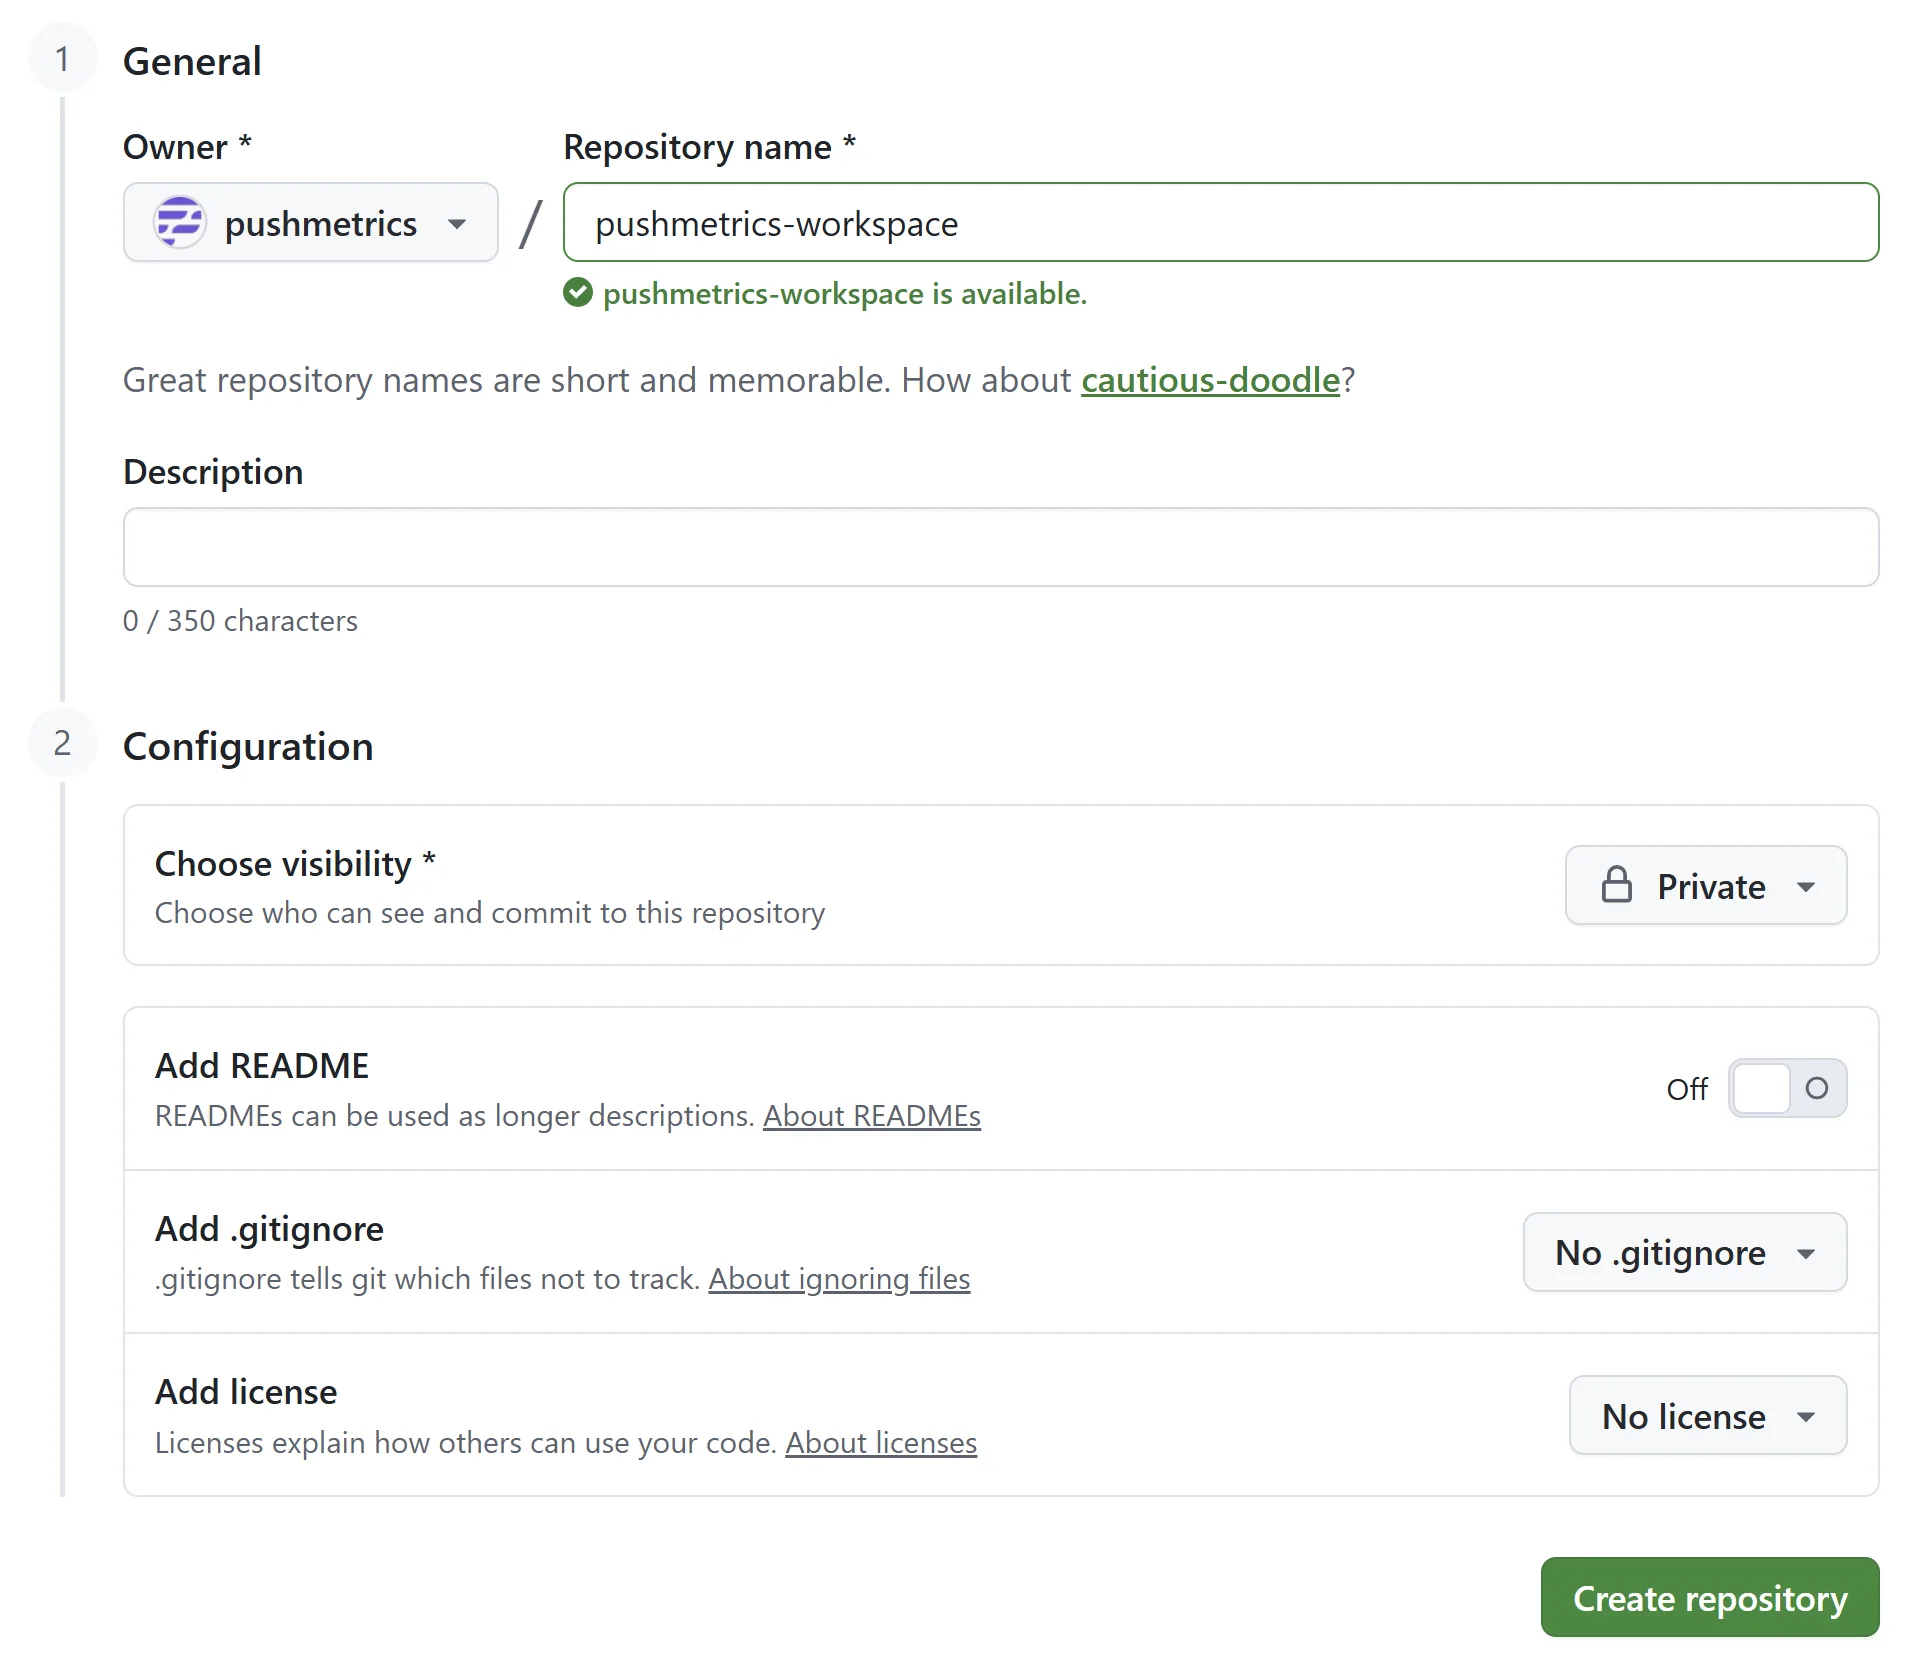
We recommend creating a brand-new, empty private repository dedicated to your PushMetrics reports. An empty repo is the easiest starting point — PushMetrics will create the first file the first time you publish a report.
- In GitHub, click the + menu in the top-right corner and choose New repository.
- Pick the Owner (yourself or your organization) and a Repository name (e.g.
pushmetrics-workspace). - Set visibility to Private.
- Leave "Add a README file" unchecked. Do not add a
.gitignoreor a license either — you want a fully empty repo. - Click Create repository.
Official GitHub guide: Creating a new repository.
Create a Personal Access Token
PushMetrics authenticates to GitHub with a Personal Access Token (PAT) that you generate in your GitHub account. The token is stored encrypted on our servers and is only used to push and pull report YAML files for the workspace it is configured on.
GitHub offers two kinds of PATs. Either works with PushMetrics — pick the one that matches your security policy.
Common starting steps for both options:
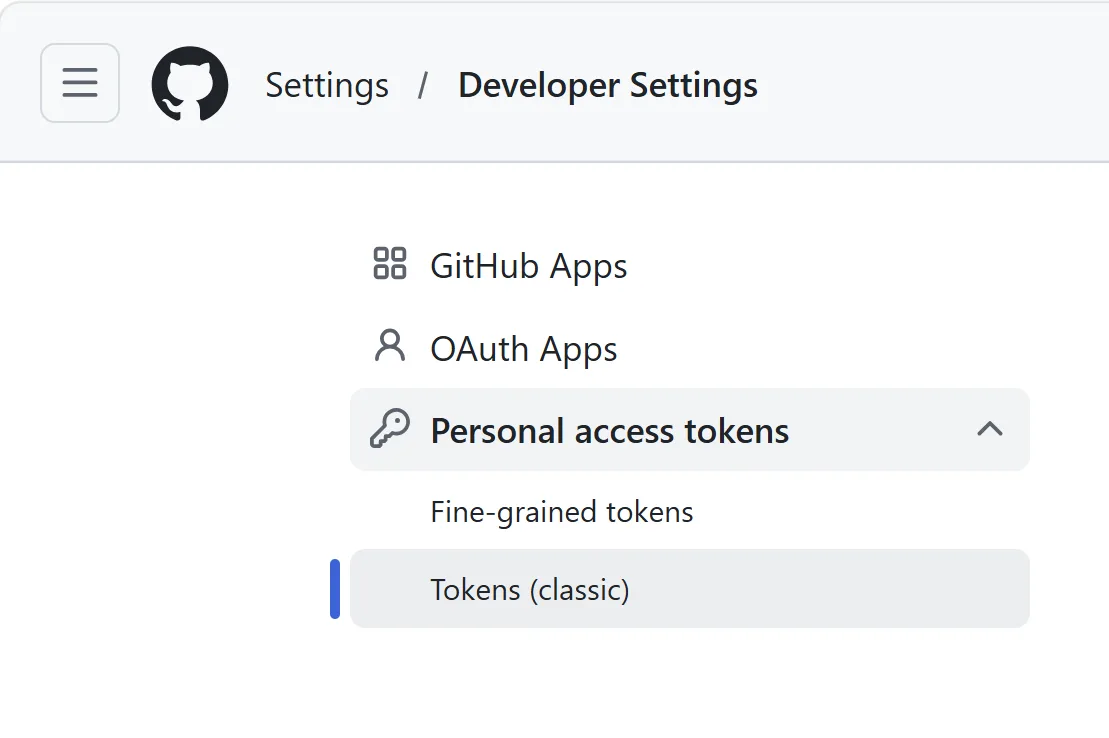
- In GitHub, click your profile avatar (top-right) and choose Settings.
- Scroll all the way down the left sidebar to Developer settings.
- Click Personal access tokens.
Direct link: github.com/settings/tokens.
Option A — Fine-grained personal access token
A fine-grained token can be scoped to a single repository with only the permissions PushMetrics needs. This is the more secure option and is the right choice for most organizations.
- Choose Fine-grained tokens → Generate new token.
- Give it a descriptive name (e.g.
pushmetrics-<workspace>) and an expiration date. - Under Repository access, select Only select repositories and pick the repository you just created.
- Under Permissions → Repository permissions, set Contents to Read and write.
- Click Generate token and copy it immediately — GitHub only shows it once.
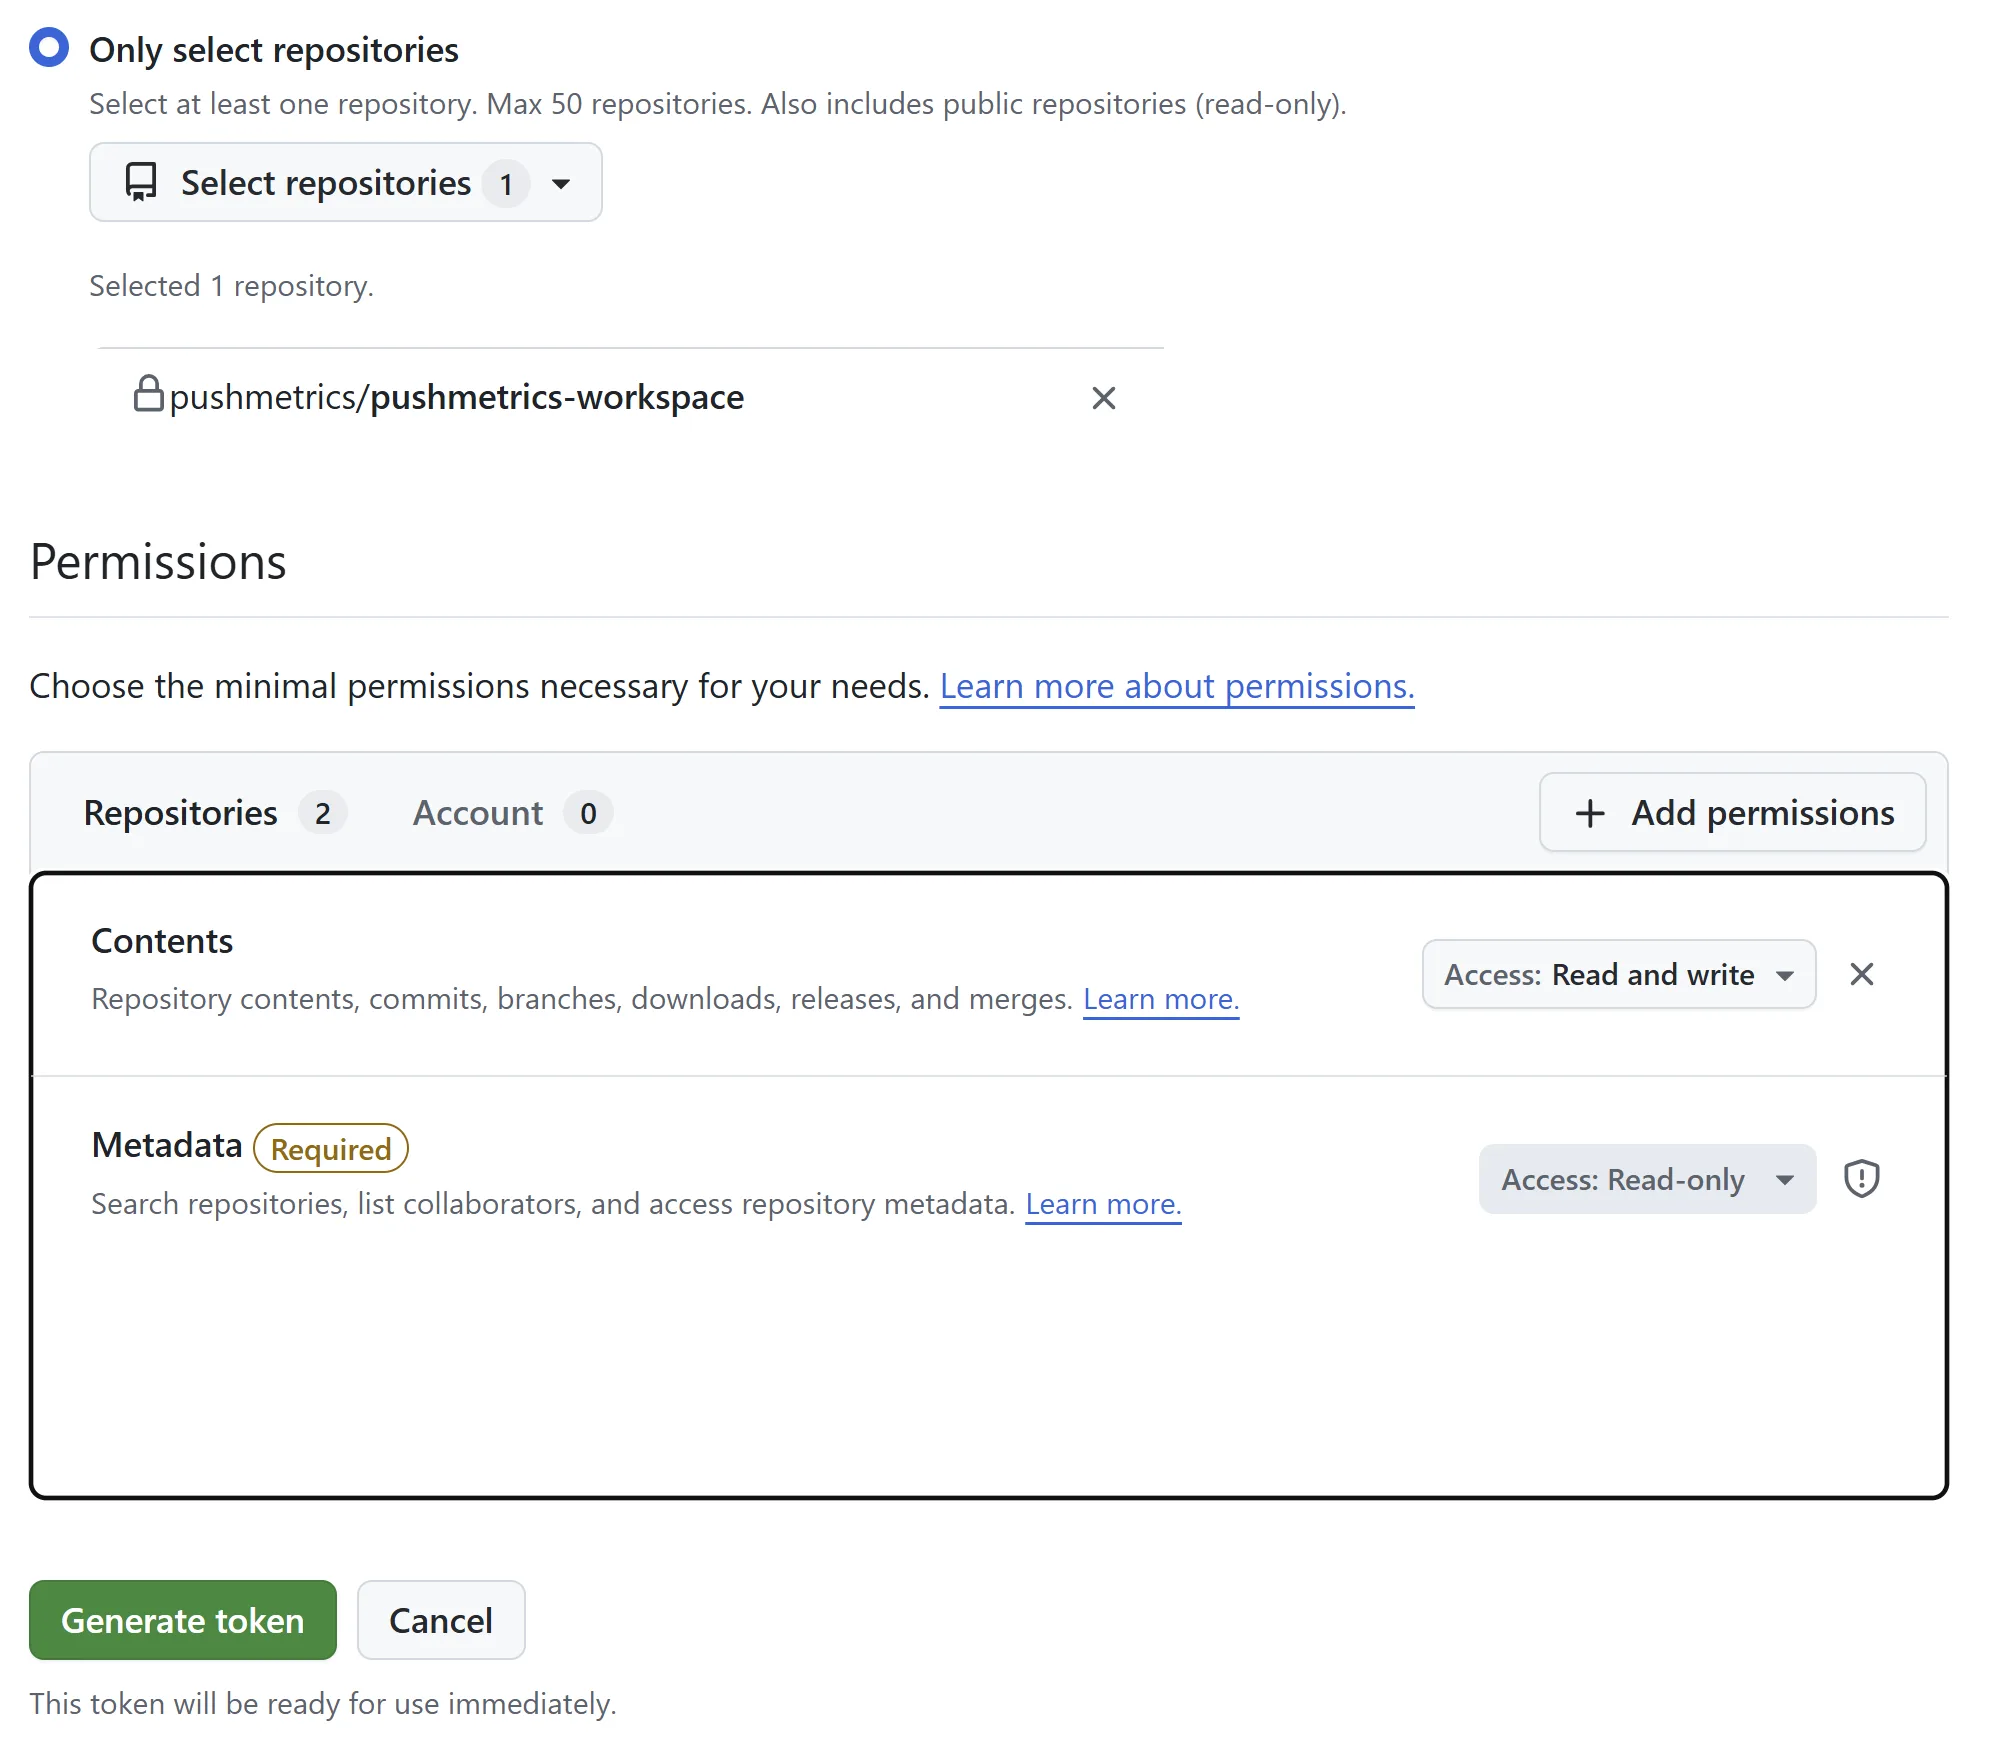
Official GitHub guide: Creating a fine-grained personal access token.
Option B — Classic personal access token
A classic token is quicker to create — a single checkbox covers everything — but the repo scope grants access to all of the repositories your account can see, not just the one you want PushMetrics to use.
- Choose Tokens (classic) → Generate new token (classic).
- Give it a descriptive name and an expiration date.
- Tick the
reposcope (Full control of private repositories). - Click Generate token and copy it immediately.
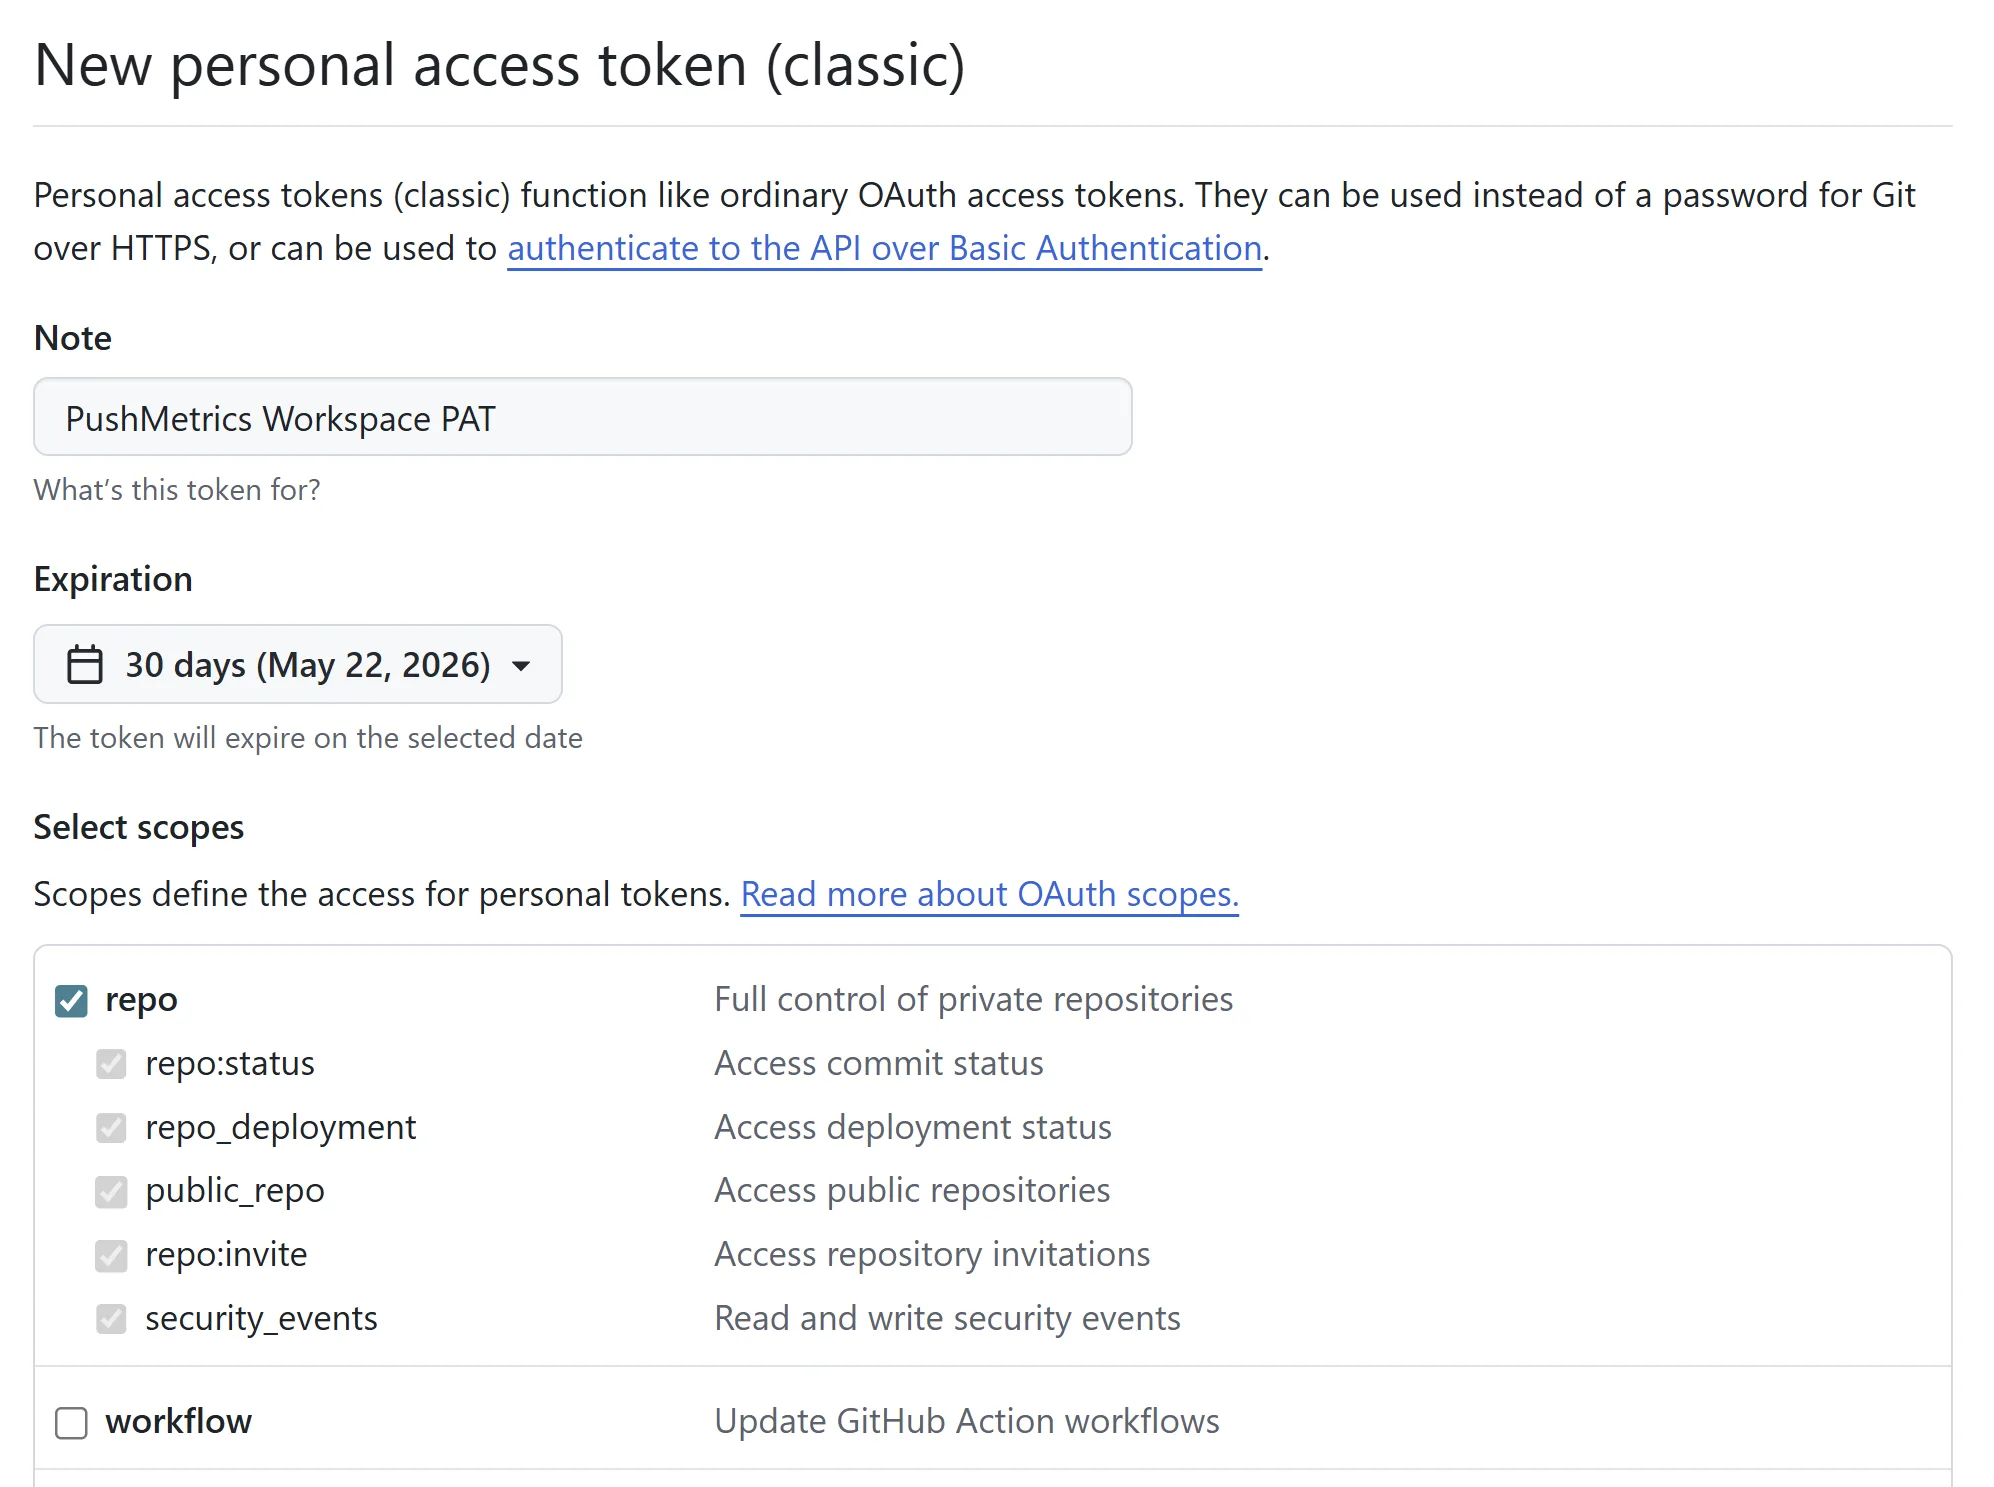
Official GitHub guide: Creating a personal access token (classic).
Configure the integration in PushMetrics
In PushMetrics, open the Account page and scroll to the Git Integration section.
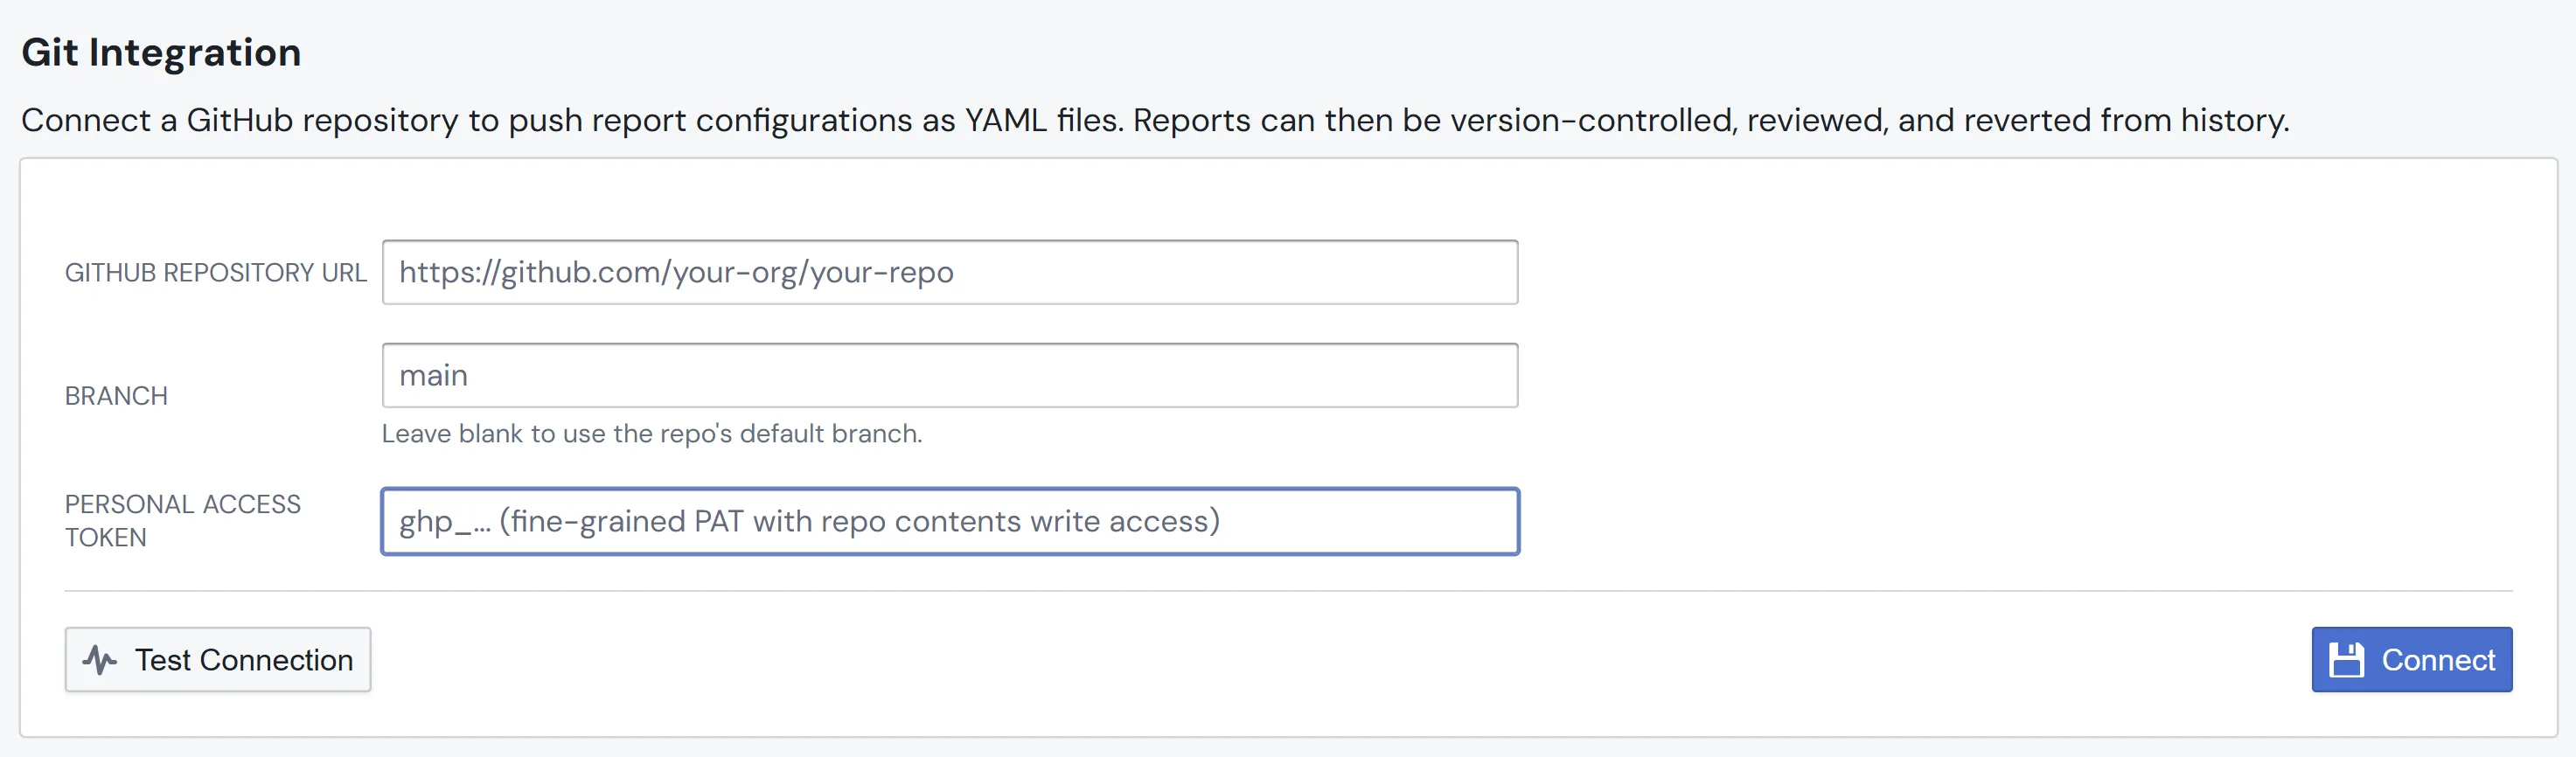
Fill in the form:
- GitHub Repository URL — the full URL of the repo you created, starting with
https://github.com/(e.g.https://github.com/acme-inc/pushmetrics-workspace). - Branch — leave blank to use the repository's default branch (usually
main). Set this only if you want to publish to a specific branch. - Personal Access Token — paste the token you copied from GitHub.
Click Test Connection. PushMetrics will call the GitHub API and confirm that the repo and credentials work. On success you'll see a green confirmation with the repo name and default branch.
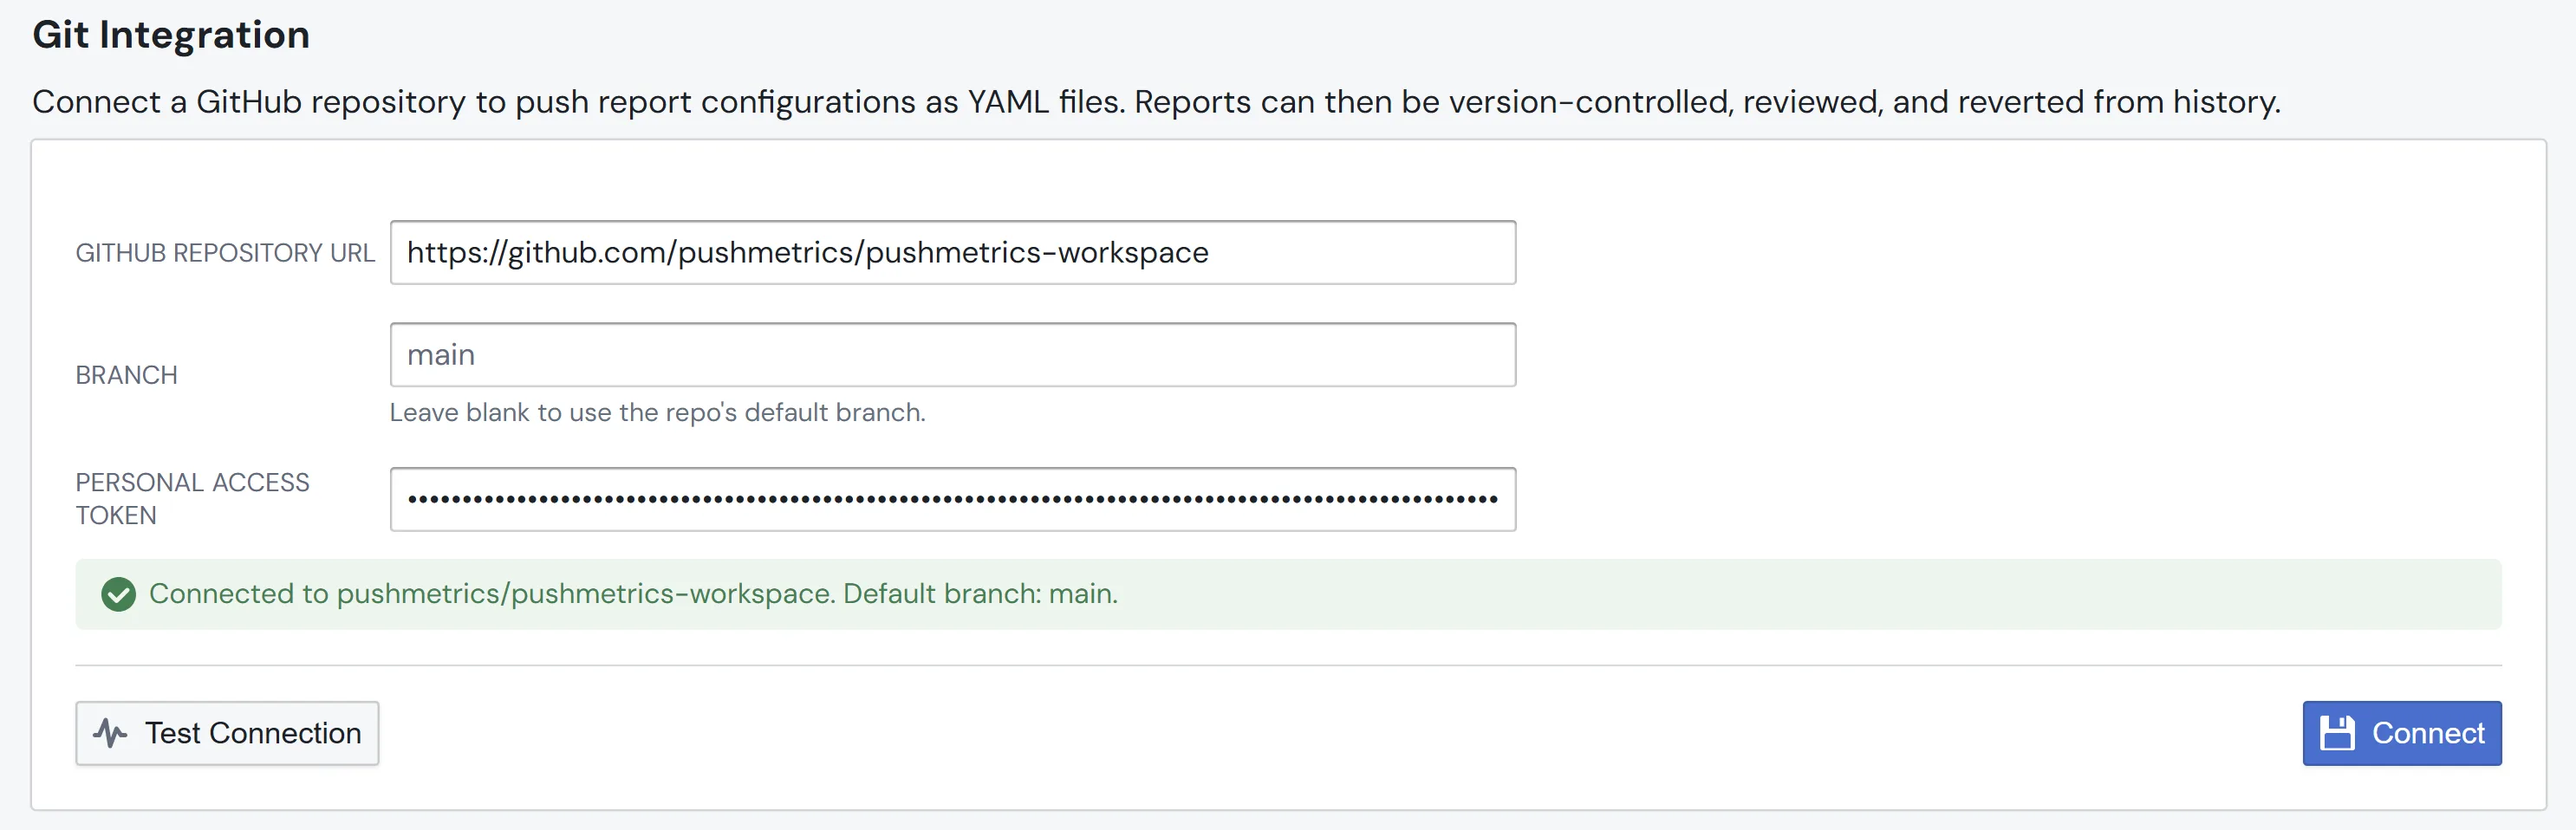
When the test passes, click Connect (or Save changes if you are updating an existing connection). Your token is encrypted on save and is never sent back to your browser. If you ever need to test the connection again later, you'll need to re-enter the token because the saved one cannot leave the server in plain text.
What changes once it's connected
Once Git Integration is configured, the Settings panel shows a Sync dropdown alongside Test Connection and Disconnect. Two actions operate on the whole workspace at once.
Workspace owns
reports/. Both sync directions treat the repository'sreports/folder as a mirror of this workspace's reports. Files outsidereports/(READMEs,.github/, other folders) are never touched. Insidereports/, what's in the workspace is what ends up in the repo, and vice versa.
Sync to Git
Sync to Git mirrors every report in this workspace into the repo's reports/ folder. One commit per sync, regardless of how many reports change. Files in reports/ that don't correspond to a current report in this workspace are removed from the repository as part of the same commit.
The result dialog shows per-report outcomes (pushed, unchanged, deleted, skipped for unsupported types) plus an envelope with elapsed time and any warnings.
If your workspace happens to be empty and the repo's reports/ folder still has files, Sync to Git asks you to confirm before wiping the folder — that's the only confirmation prompt the simplified flow has.
Sync from Git
Sync from Git pulls the contents of reports/ and reconciles them into the workspace.
- Reports whose YAML carries a
uidmatching an existing report are updated in place. - YAML files with no
uid, or with auidthat doesn't match any local report, are created as new reports. When the YAML had nouid, PushMetrics assigns one and writes it back to the file in the repo (one extra commit) so future syncs are stable. - Reports that PushMetrics had previously synced from this repo and that no longer appear under
reports/are deleted from the workspace — git is the source of truth, the history is in the repo, and you can revert any individual report from its Git History. Reports you created locally and never pushed are never touched.
When you open the Sync from Git dialog, PushMetrics shows a preview of which local reports would be removed if you confirm — informational only, the Pull from Git button is a single click that runs the sync.
Per-report history
Every report has a Git History button (in the editor header, when the workspace is git-connected). It lists every commit that touched this report's YAML and lets you preview and revert to any past version. Reverting reapplies that historical YAML to the report locally; the next Sync to Git propagates it to the repository.
Only one sync (in either direction) can run per workspace at a time. If a sync is already in progress, the second click returns immediately with a "sync already running" message — wait for the first run to finish.
Security notes
- Tokens are stored encrypted server-side using the same pattern as other integration credentials. They are never returned to the browser after saving.
- Prefer a fine-grained PAT scoped to a single repository. Revoking it in GitHub immediately cuts off PushMetrics' access without affecting your other repos.
- Disconnecting does not delete anything in GitHub. The "Disconnect" action removes the saved repo URL and token from PushMetrics, but the YAML files already in your repository stay where they are.
- Branch protection rules block direct publishes. If your default branch requires pull requests, configure PushMetrics to publish to an unprotected branch for now. A pull-request-based workflow is on the roadmap.
Troubleshooting
-
Test Connection fails with a 401 error — the token is wrong, has expired, or doesn't grant Contents: Read and write on the repository. Generate a new token and try again.
-
Sync fails with a "branch protected" error — the configured branch has GitHub branch-protection rules that prevent direct pushes. Switch PushMetrics to an unprotected branch, or relax the protection rules on the target branch.
-
Clones on Windows show some
reports/*.yamlfiles asdeleted— this happens when two report UIDs in the workspace differ only in case (e.g.pqLvqJYrzaandpqLvqjYrza). GitHub stores them as separate files (the repo is case-sensitive), but Windows NTFS and default macOS filesystems are case-insensitive — on checkout, each pair collapses into a single file and git reports the twin as missing. Nothing is actually missing on GitHub. The danger is that committing from that broken working tree would push the collapse back up, silently deleting one file per pair in the remote. Two workarounds:-
Mark the
reports/directory case-sensitive before cloning (Windows 10+, admin PowerShell):mkdir C:\path\to\pushmetrics-workspace\reports fsutil file setCaseSensitiveInfo C:\path\to\pushmetrics-workspace\reports enable cd C:\path\to\pushmetrics-workspace git init git remote add origin <your-repo-url> git fetch git checkout mainThis is a per-directory NTFS flag that lets git keep both files side-by-side.
-
Use WSL or a Linux/macOS case-sensitive volume for your local checkout. Git and the filesystem agree, and both files survive the round-trip.
PushMetrics also surfaces a yellow "Case-sensitive UID collisions" callout on the Sync to Git results dialog when any colliding UIDs are detected, so you know which ones to watch out for.
-