PushMetrics allows you to connect your own SMTP server for sending reports and notifications. This gives you full control over sender addresses, delivery settings, and security.
Prerequisites
Before you begin, ensure you have:
- SMTP server access credentials:
- SMTP hostname
- Port (e.g.,
465for SSL,587for TLS) - Username and password
- At least one verified sender email address
- Firewall configuration:
Allow inbound connections from PushMetrics to your SMTP server: 18.156.113.81/32
Steps to Connect SMTP Server
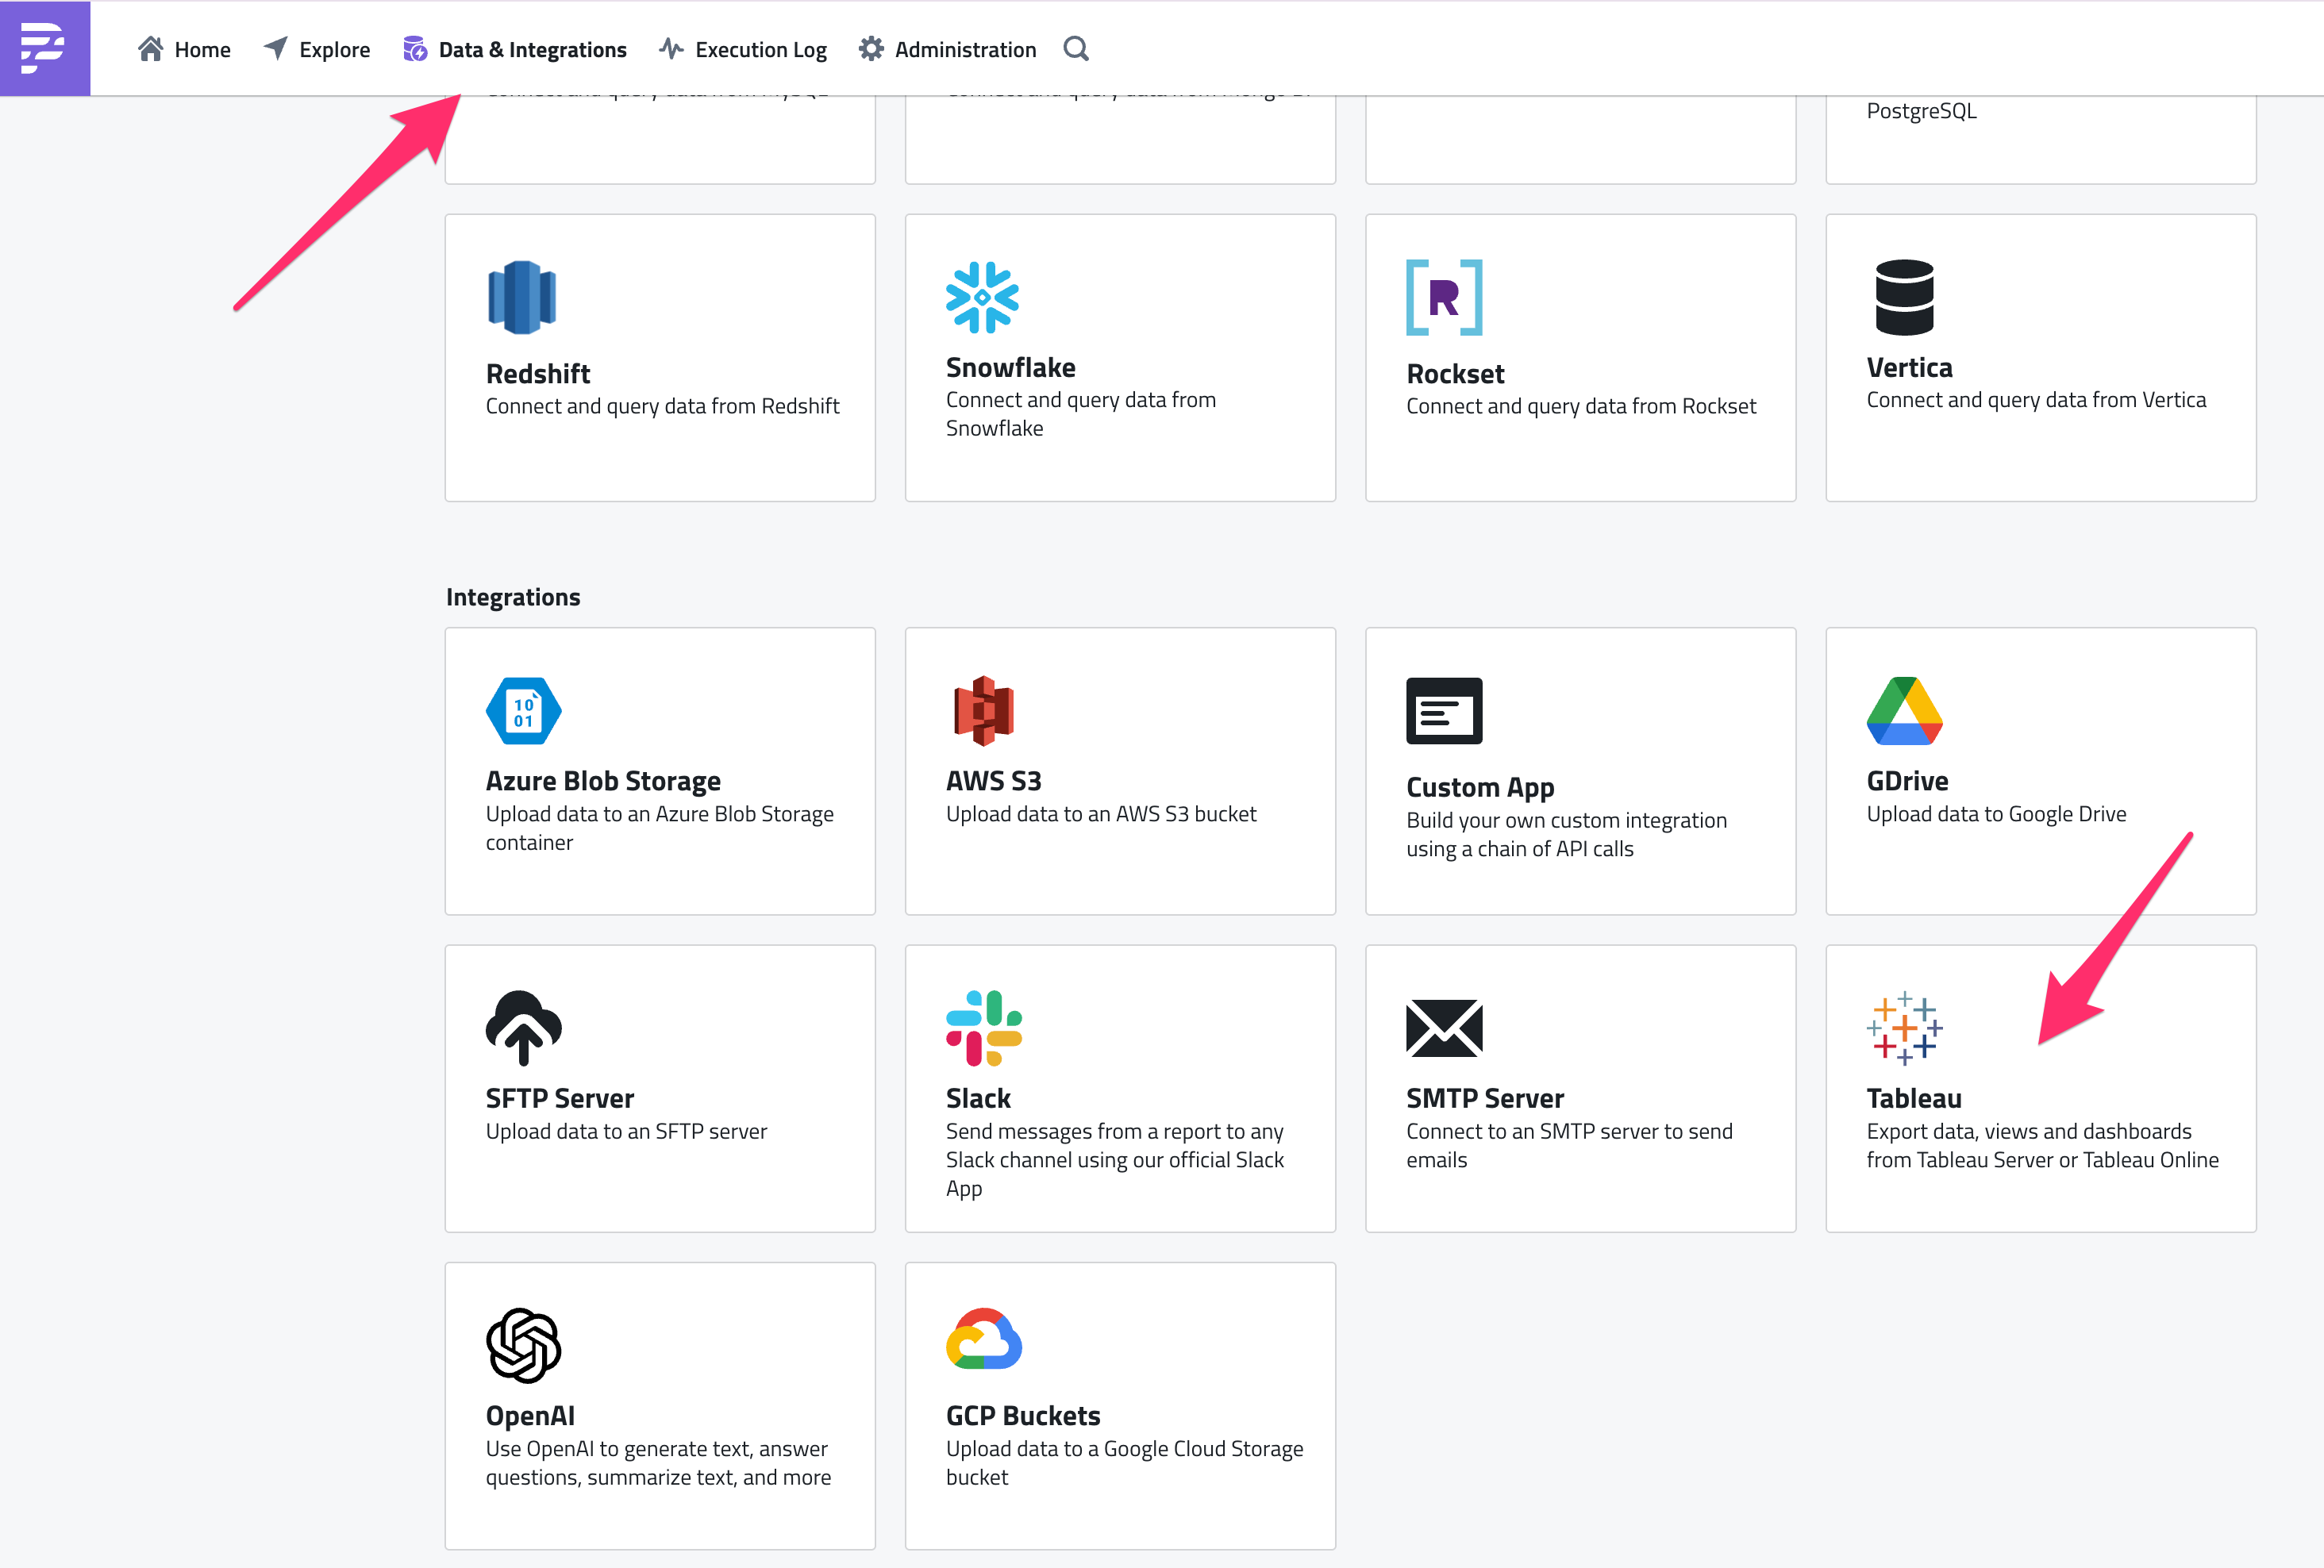
1. Open Integrations in PushMetrics
Go to Data & Integrations and select SMTP Server.
2. Fill in SMTP Server Details
Complete the fields as shown below:
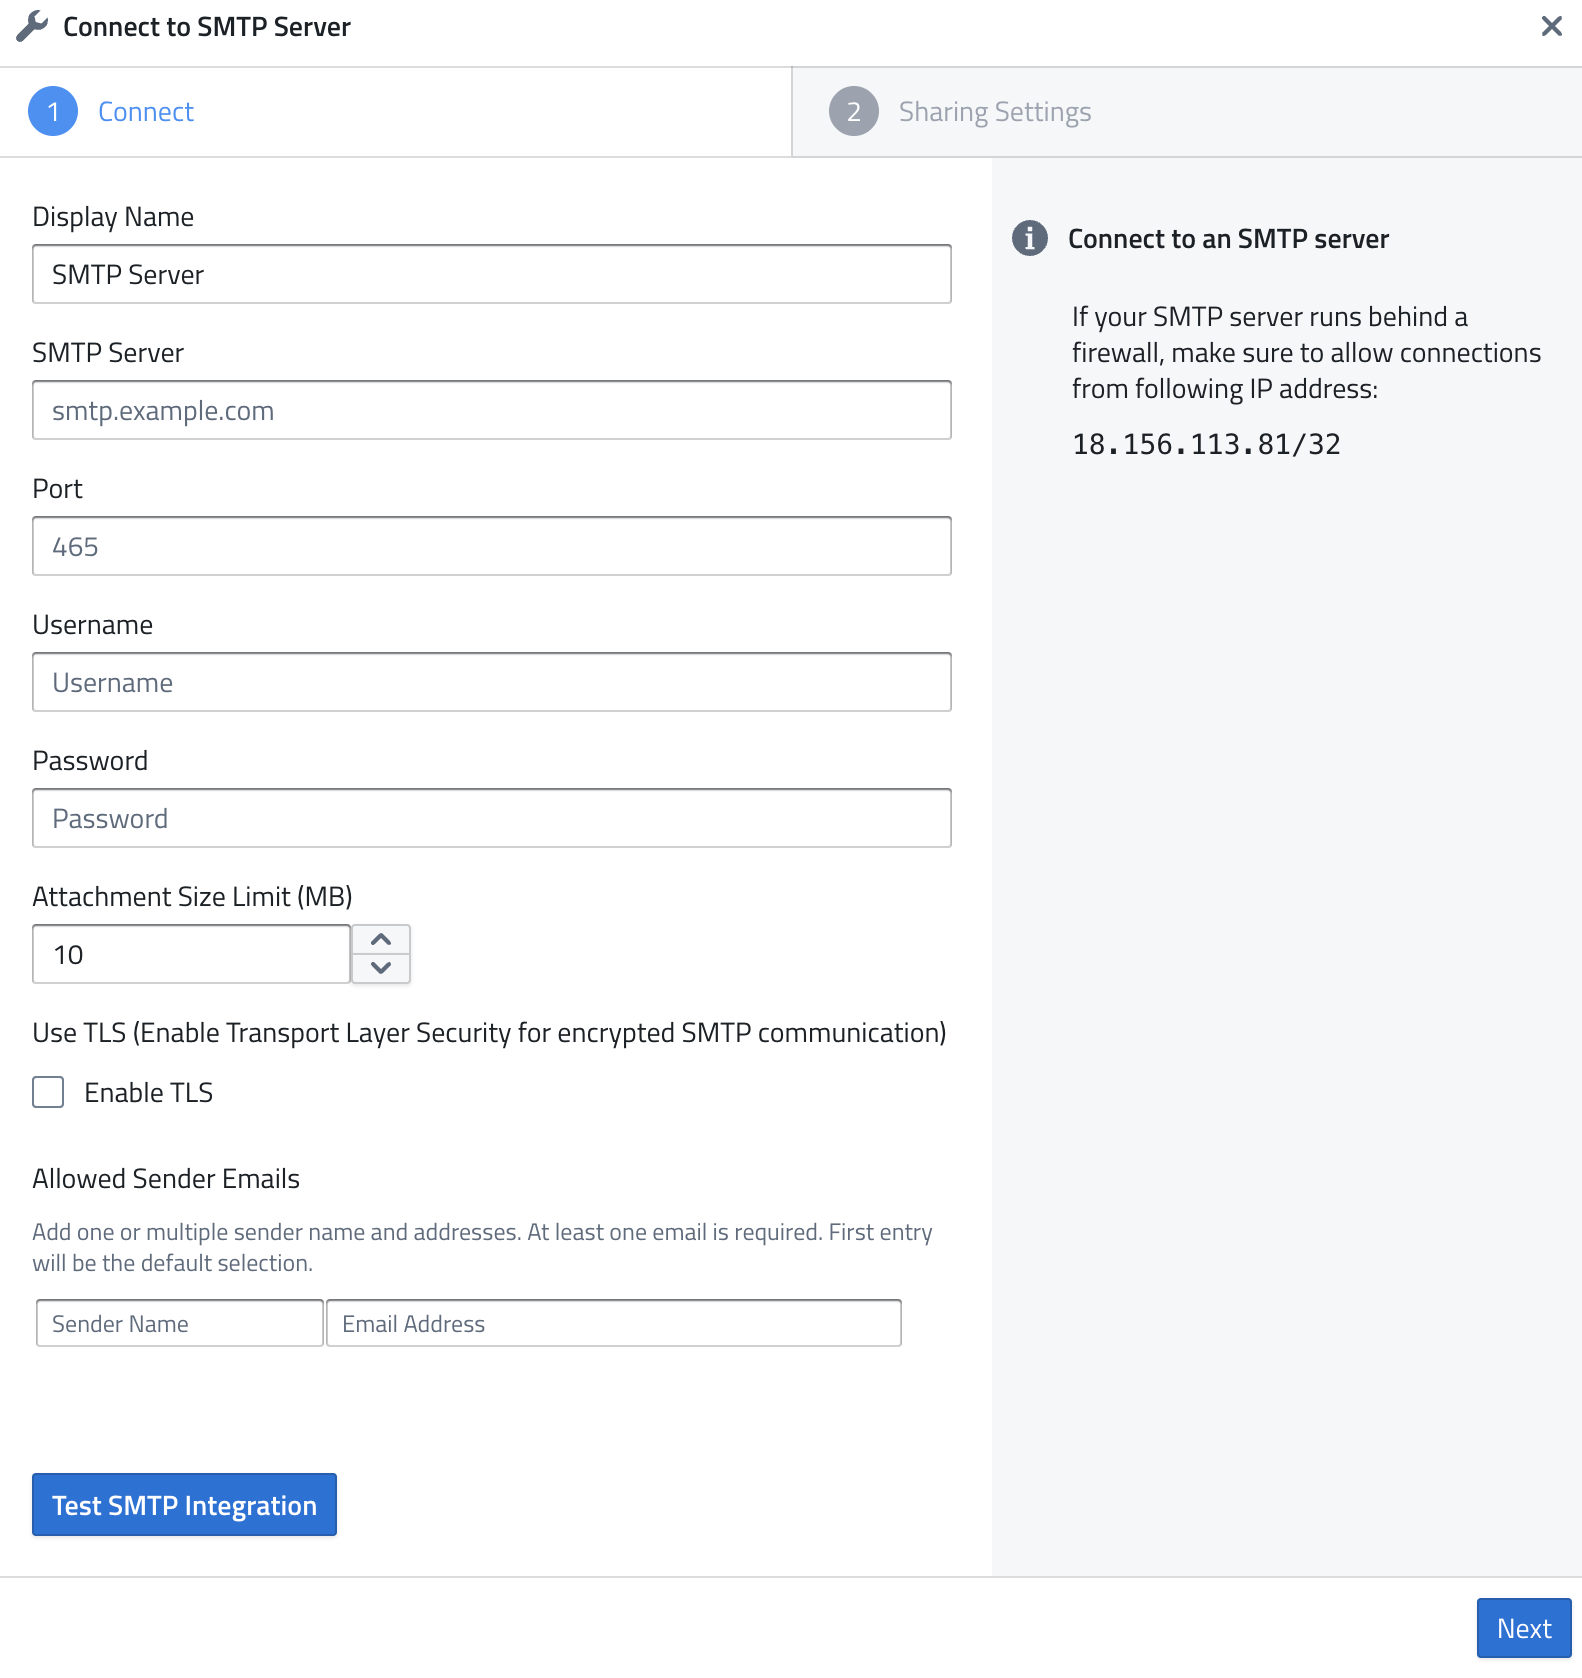
- Display Name: A friendly name for your integration (e.g.,
SMTP Server). - SMTP Server: Your SMTP server address, e.g.,
smtp.example.com. - Port: The SMTP port (commonly
465for SSL or587for TLS). - Username & Password: Credentials for authenticating with your SMTP server.
- Attachment Size Limit (MB): Maximum size for email attachments.
- Enable TLS: Check this if your SMTP server requires TLS encryption.
- Allowed Sender Emails: Add at least one sender email address and display name.
3. Test Your Connection
Click Test SMTP Integration to ensure PushMetrics can send email through your server.
4. Save & Activate
Click Next to finalize your SMTP configuration.
Notes
- The first sender email you enter will be used as the default sender.
- If your SMTP server requires IP allowlisting, make sure
18.156.113.81/32is whitelisted. - Use TLS for secure communication whenever possible.