PushMetrics can connect to Tableau Online or Tableau Server to download exports of Workbooks, Views and Dashboards in various formats.
The exported files can then be used in subsequent tasks, e.g. to be sent in an email or Slack message.
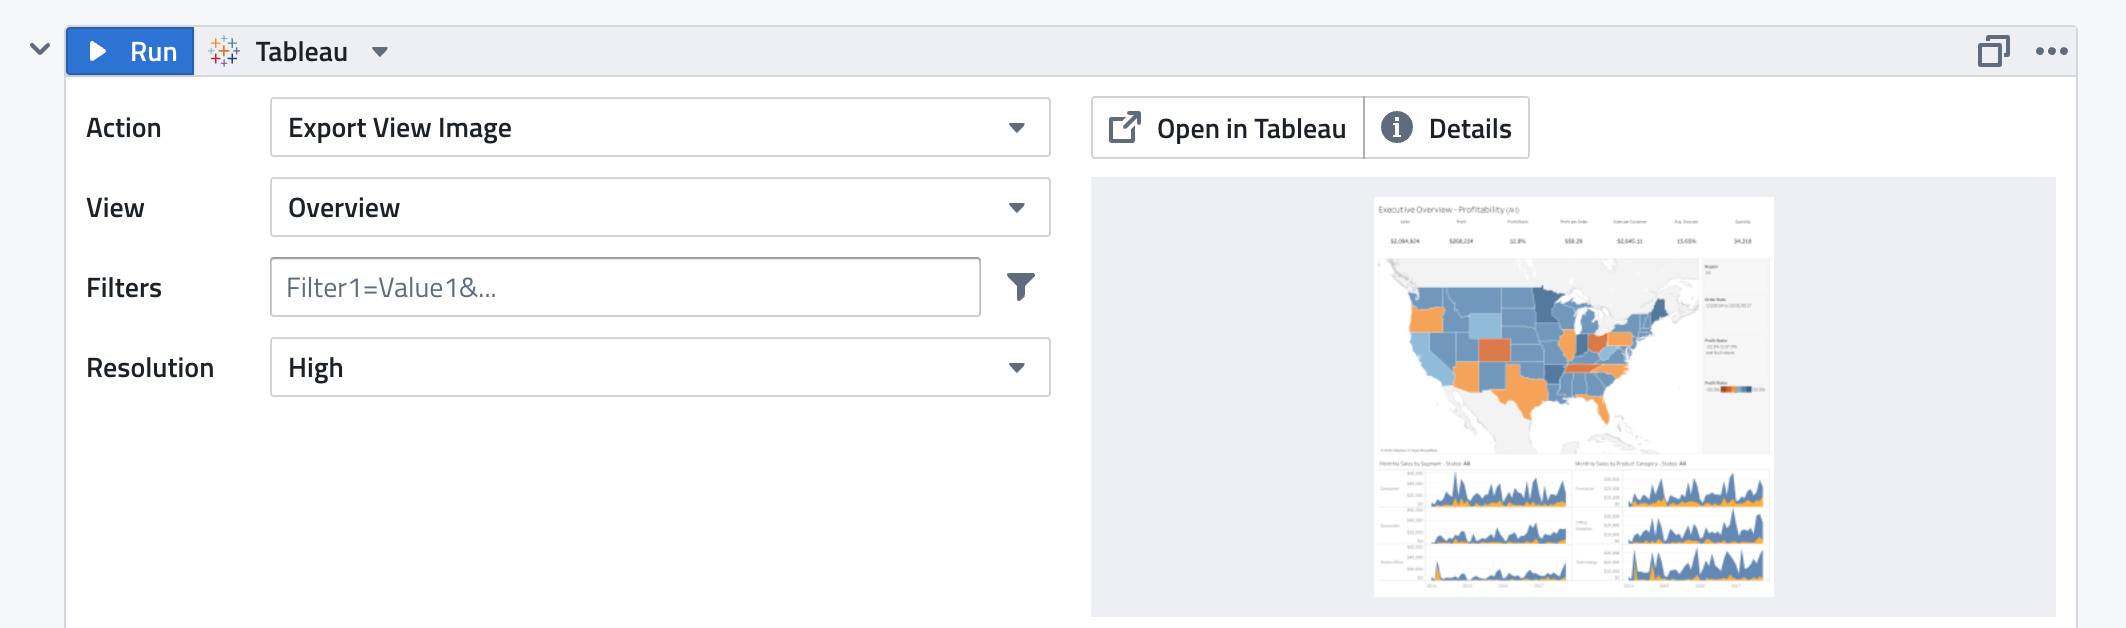
Creating a Tableau Export
Supported Actions
You can export Tableau workbooks, views and dashboards in the following ways:
| Method | Description |
|---|---|
| Export Workbook PDF | returns a PDF of the entire workbook (only sheets that are shown as tabs) Options: |
| Export Workbook Powerpoint | returns a PPTX of the entire workbook (only sheets that are shown as tabs) Options: |
| Export View PDF | returns a PDF of the selected view Options: |
| Export View CSV | returns a CSV of the selected view Options: |
| Export View Image | returns a PNG image of the selected view Options: |
| Export View Crosstab XLSX | returns a crosstab XLSX of the selected view Options: |
| Export View Crosstab CSV | returns a crosstab CSV of the selected view Options: |
Filtering Views
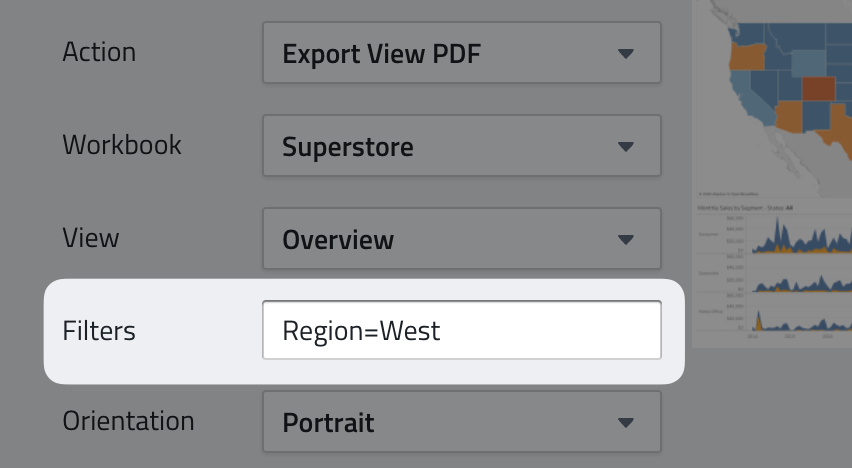
You can pass filters to the view you are exporting to generate a filtered file.
- Filters need to be entered as strings, without quotes.
- The general format is
FilterName=FilterValue, e.g.Region=West - To apply multiple filter values, separate values using commas, e.g.
Region=West**,**Central - To combine multiple filters, concatenate using
&, e.g.Region=West**&**Category=Furniture - You can use Jinja in the filter string, e.g.
Region={{ parameter_1 }} - You can even make the filter fully dynamic, e.g.
{{ filter_name }}={{ filter_value }}
Live Filter Selection
Instead of manually typing filter strings, you can use the Live Filter Selection feature to interactively select filters from an embedded Tableau view.
Click the filter icon (funnel) next to the Filters input field to open the Live Filter Selection dialog.
![]()
In the Live Filter Selection dialog:
- Sign in to Tableau Cloud or use your Tableau ID to authenticate.
- Once signed in, the Tableau view is embedded directly in the dialog. You can interact with the view's filters — click on regions, select dropdown values, etc.
- As you interact with filters in the embedded view, the Filter String field at the top automatically updates to capture your selections (e.g.,
Region=Central). - You can also edit the filter string manually in the text field and click Apply to update the embedded view.
- Click Save Filters to apply the captured filter string to your Tableau export block.
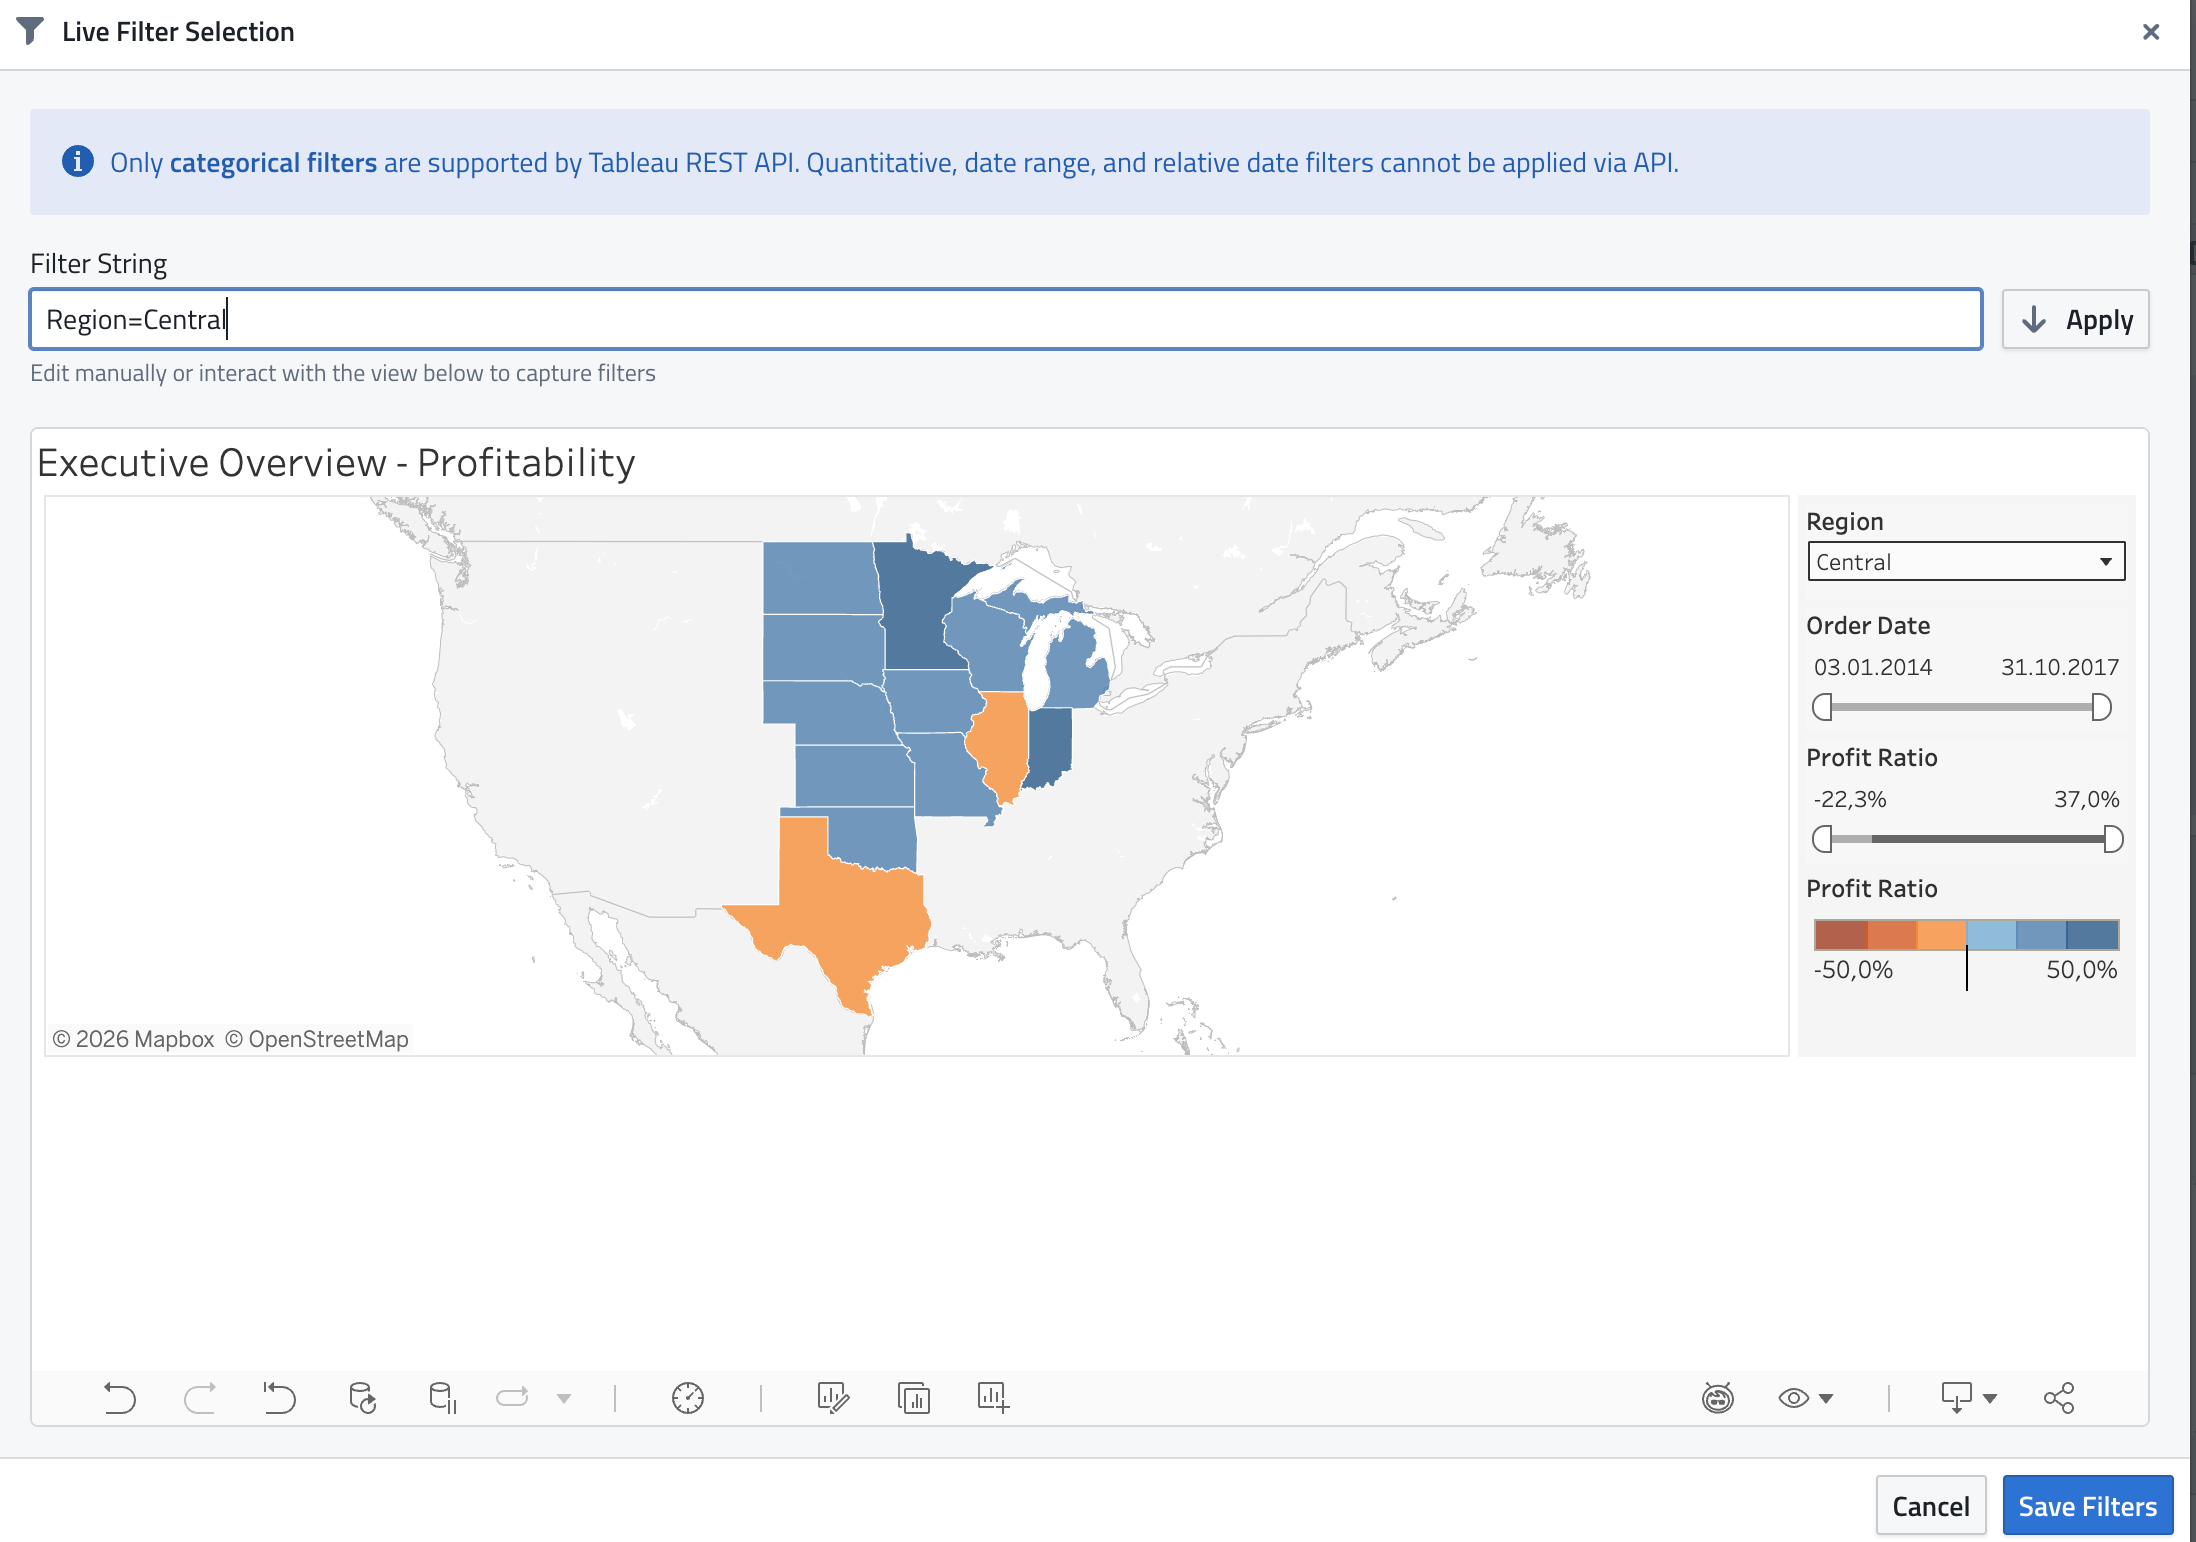
Live Filter Selection is the easiest way to configure filters — you can visually confirm the exported data matches what you expect before saving.
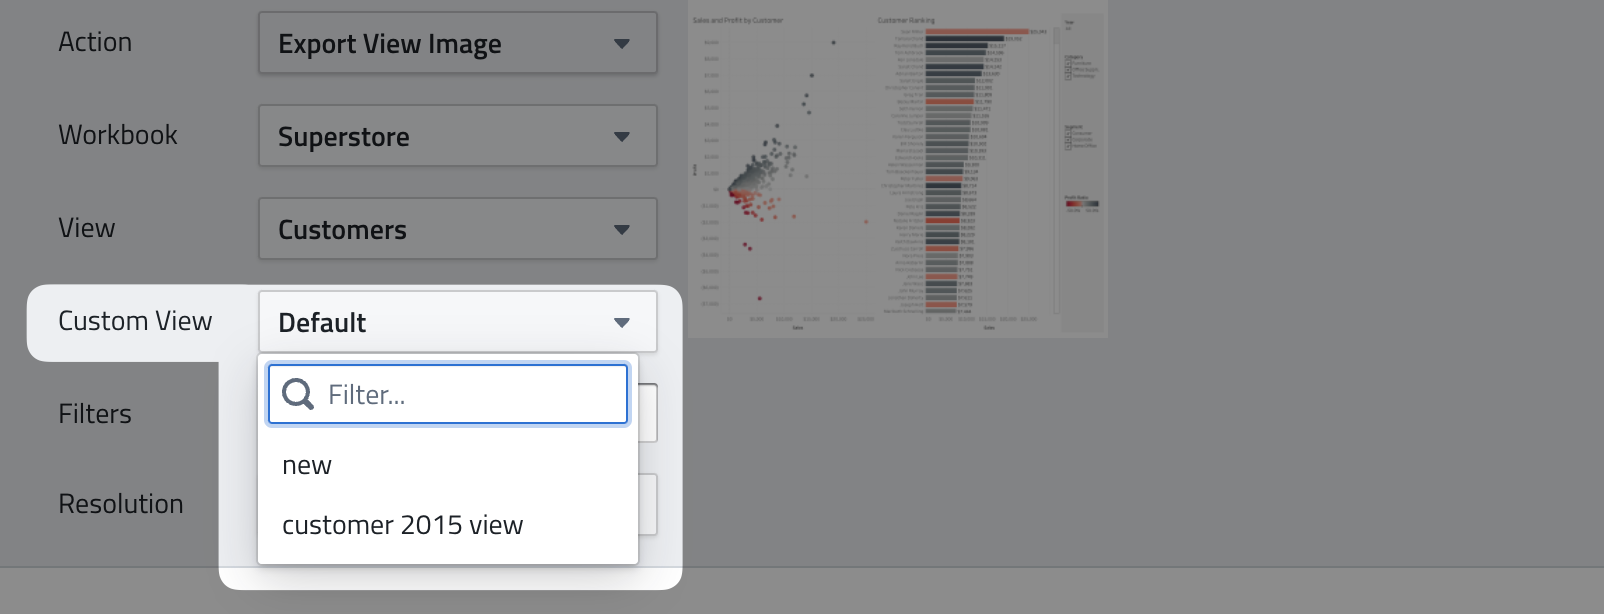
Custom Views
If a view has Custom Views defined, you can select them to be exported for the Export View Image method. Other methods are currently not supported by the Tableau API.
Custom Views can not be further filtered.
Troubleshooting Filters in Tableau
Filtering is sometimes a little tricky as Tableau requires the filter string to be very accurate, in the correct syntax and not everything is possible.
The best way to troubleshoot is directly in Tableau: Open the view you want to filter in your browser (in Tableau Server or Tableau Online) and look at the URL bar. Remove everything right of the ? and type your filter in the syntax Filtername=Filtervalue , hit enter and see if you get the desired result.
If you can get it to work here, it will work in PushMetrics.

Known Filtering Limitations
Unfortunately, Tableau only allows filters to be passed on via a simple filter string and not all types of filters are supported.
As of now, the following limitations to filtering are known:
- Date sliders and relative date filters don’t work due to Tableau API limitations. A workaround is described here.
- Filter names must be specified exactly as the field name in Tableau - If you change the title in the view to a more legible format (e.g.
Order Dateinstead ofDAY(Order Date)), you still need to use the original field name in PushMetrics. - Special characters like
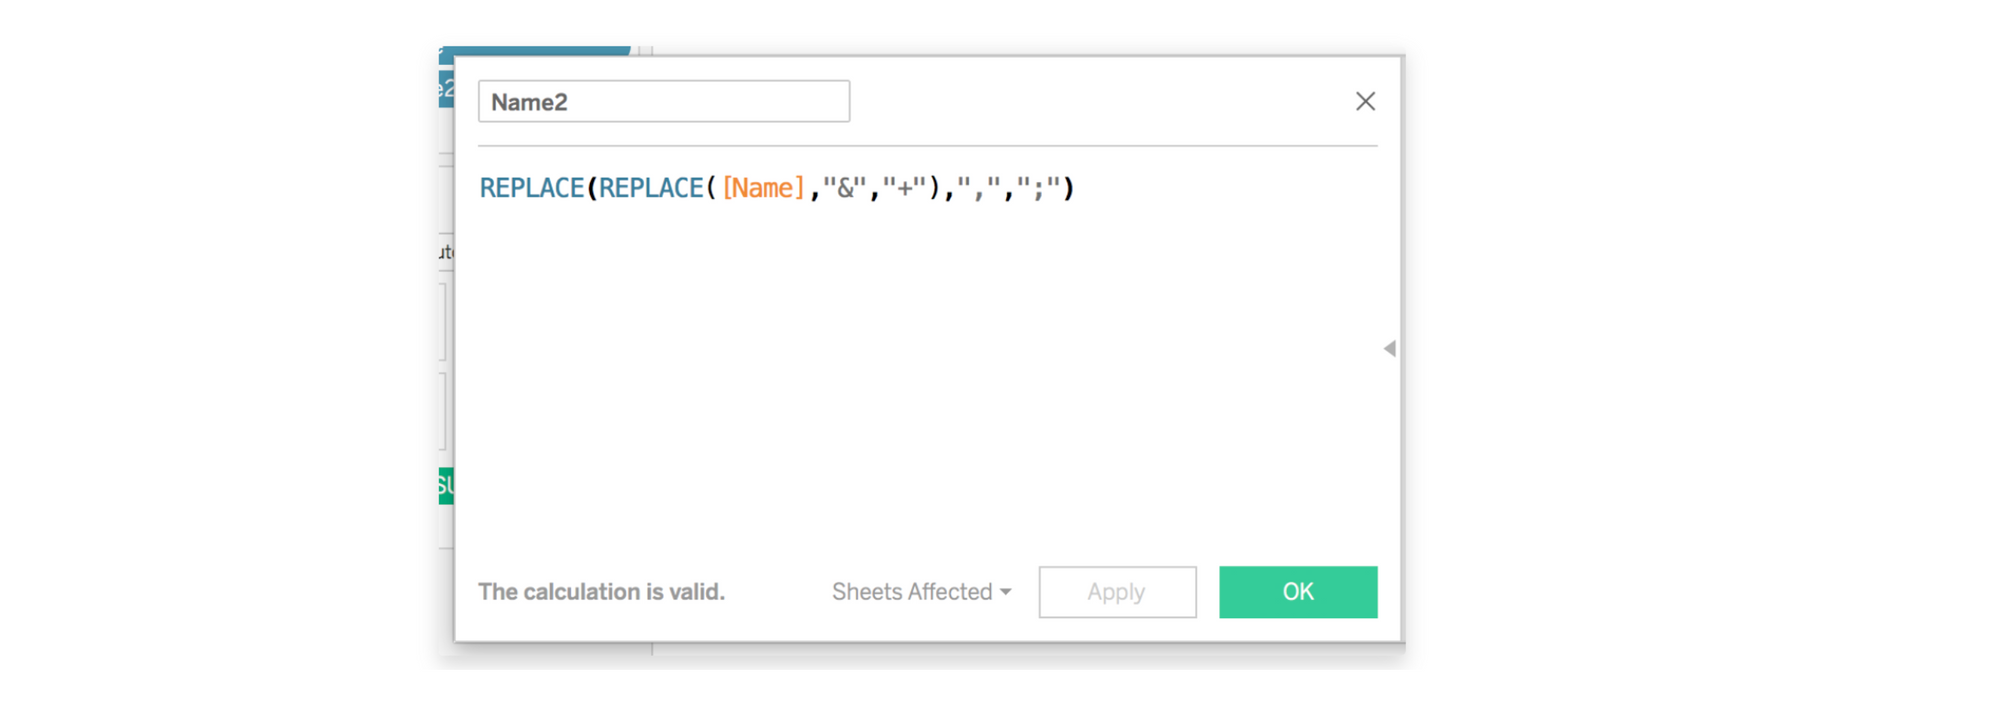
,and&will break the filter as they are reserved for separating multiple filters and filter values. - If your filter values have such characters (for example a
Cityfilter with a value likePortland, OR), as a workaround, you’d need to replace them in Tableau with a simple calculated field that replaces the special character with a different character.
Then, you use that new calculated field for filtering instead of your original field.
Here’s what it looks like: Formula:REPLACE(REPLACE([Name],"&","+"),",",";")with[Name]being the original filter name.
- If a workbook has parameters and fields both named the same, filtering those can result in unexpected behaviour. We recommend renaming one value to keep names distinct.
- A good resource for some more considerations is this help article from Tableau.
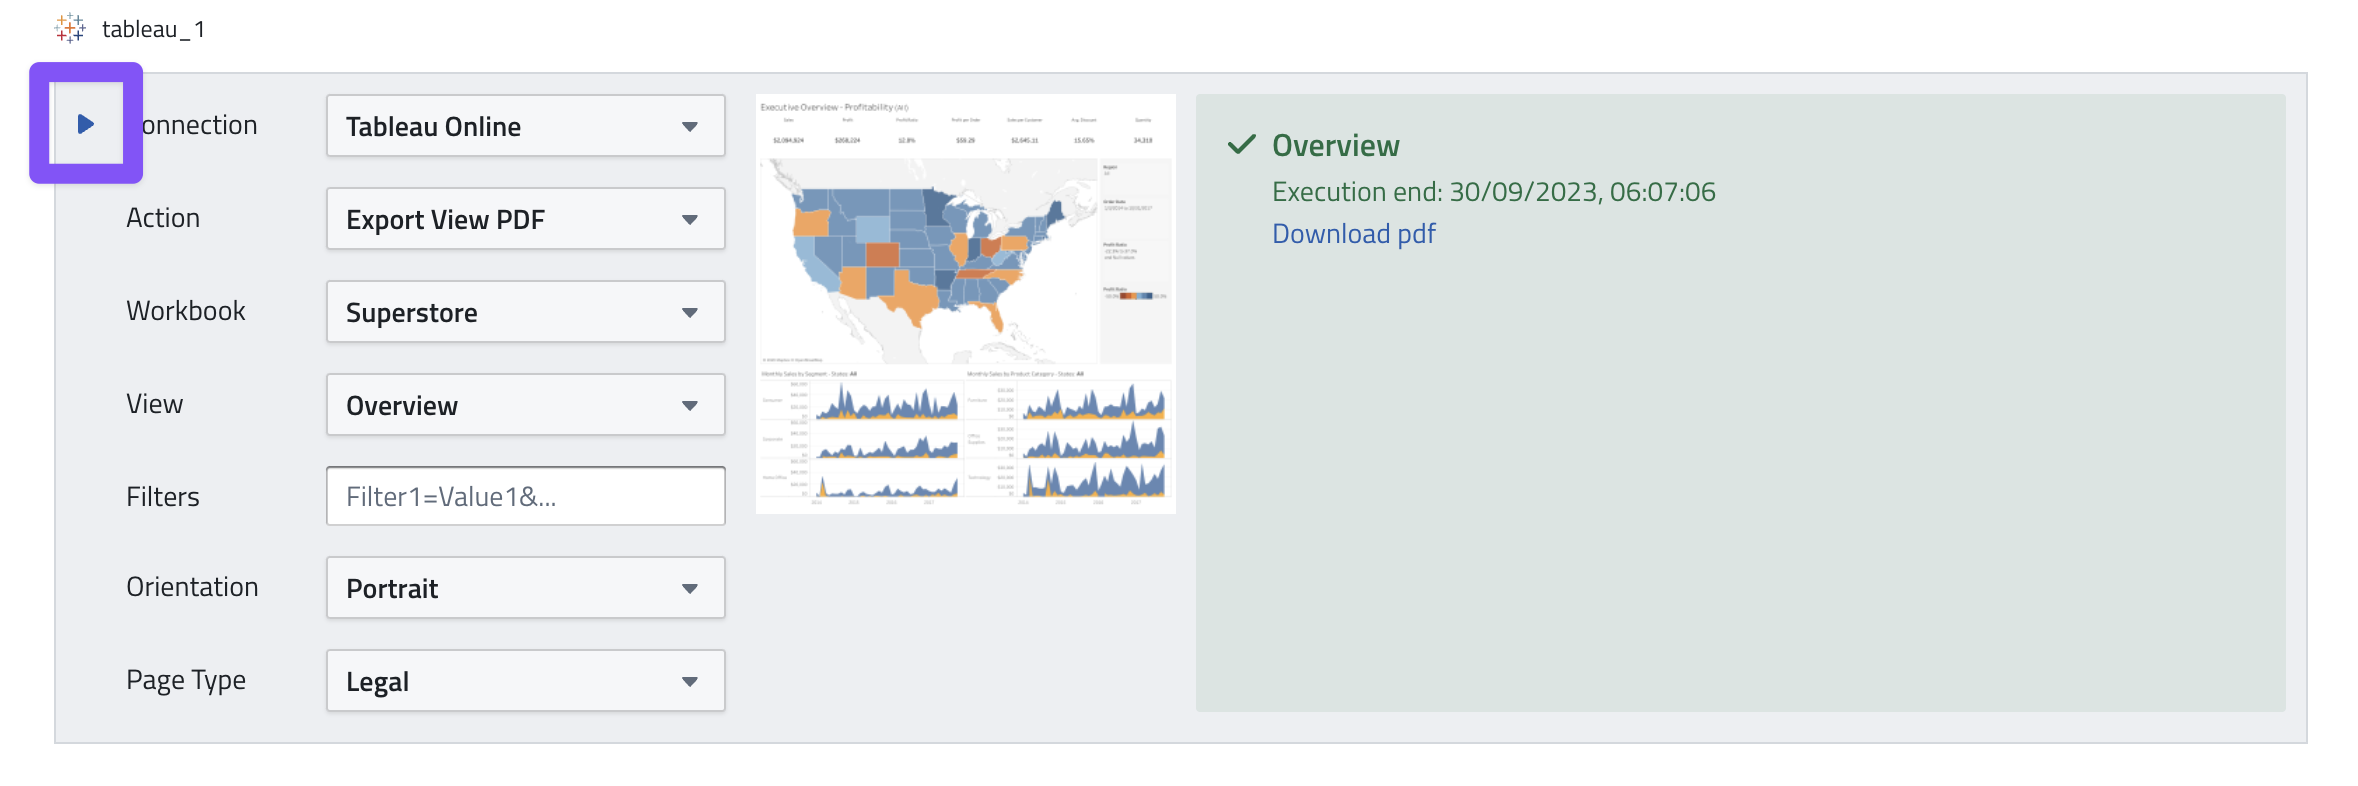
Task Execution
To execute the task, simply click on the Play button.
Using exported files in other tasks
You can use the exported file in subsequent tasks, e.g. to attach them to an Email or Slack message using the following method:
| Method | Description |
|---|---|
| .export() | returns a secure file URL of the most recent execution. Filetype depends on selected action. Filename is the block name. Options: Example Usage: Example Output: |
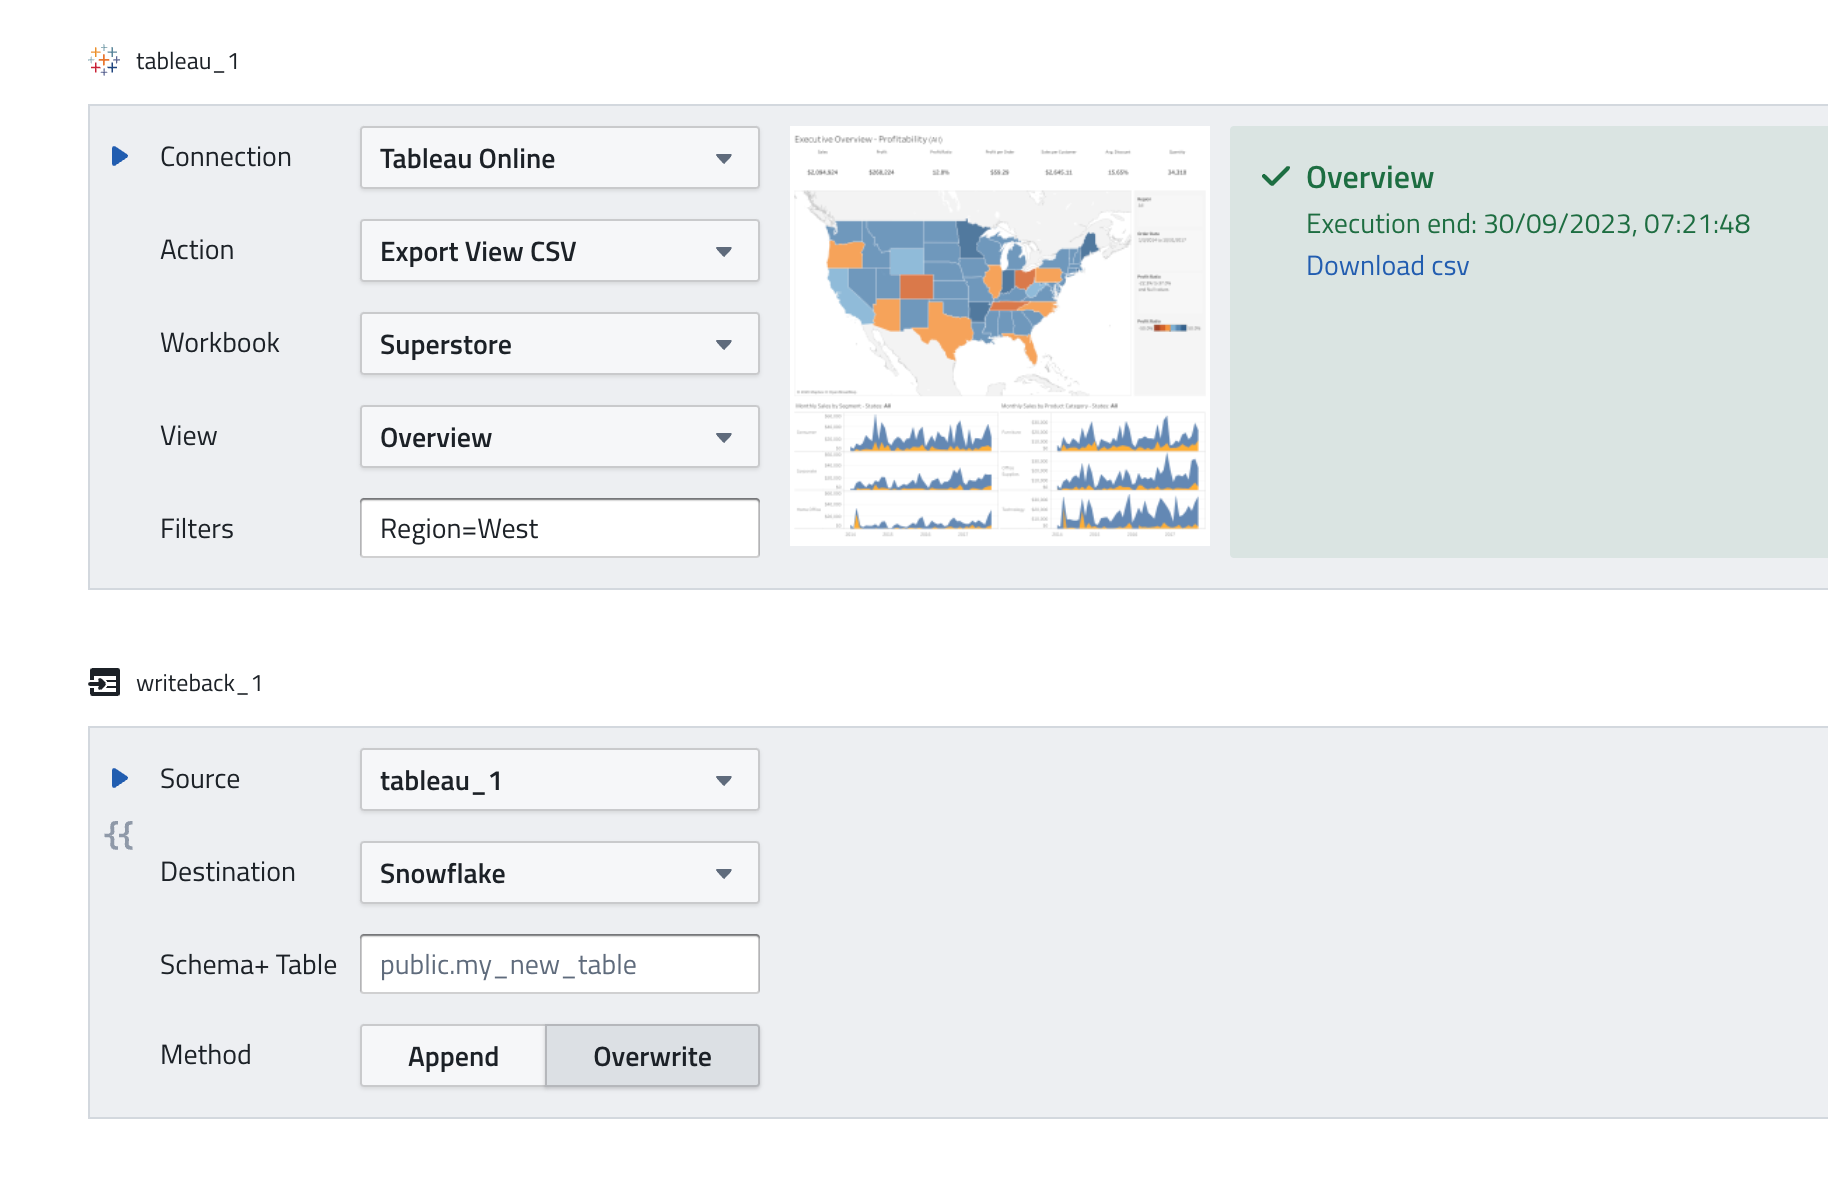
Use CSV export in Database Writeback
Exported CSV files can be used in Writeback tasks to write the csv contents to a database table.
If a Tableau task with "Export View CSV" action is present, the task will show up as an option in the "Source" input of a writeback task.
Additional Options
When using Tableau exports inside a Report, additional options are available to combine outputs from multiple Tableau blocks or mail merge iterations:
- Combine separate PDF files into one — merges multiple PDF exports into a single PDF file. Useful when exporting multiple views or when using Report Personalization to generate filtered exports per recipient.
- Combine separate CSV and XLSX files into one XLSX file — merges multiple CSV or XLSX crosstab exports into a single XLSX workbook with multiple sheets.